Tailfin Journey Rack and CargoPack Rack Top Bag Review


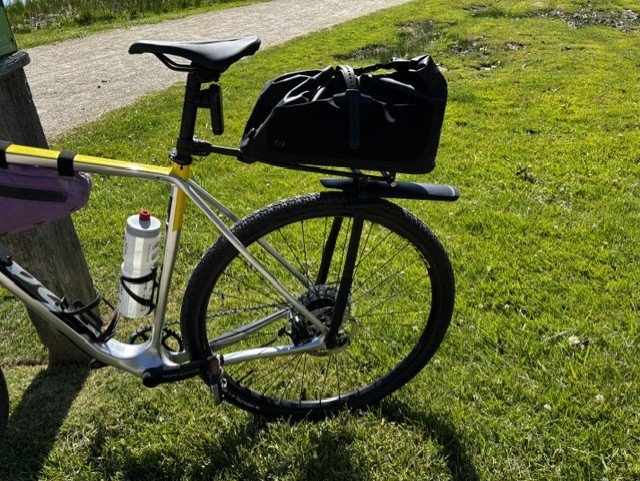
Price: $205 (non-pannier version, includes axle); $260 (pannier version, includes axle); $260 (CargoPack rack top bag)
Versions: With and without pannier mounts (Journey Rack)
Weight: 580g/1.28 lbs (non-pannier version); 740g/1.63 lbs (pannier version)
Load Capacity: 32kg/70.55 lbs (10kg per pannier + rack top bag); 22kg/48.5 lbs for non-pannier version (6kg per quad bosses + 12kg rack top bag)
Bag Capacity: 18L
Rack Material: 6061-T6 aluminum alloy
Rack Optional Accessories:
– Journey Rack Mudguard – $25
– Exposure Boost-R 3 Reakt + Mount – $165
– Cateye Nano Light + Mount – $70
Availability: Online
How Obtained: Company Sample
RBR Advertiser: No
Versatility: For Commuting to Bikepacking, Fits Any Type of Bike
Last year, I tested Tailfin’s AeroPack Cargo Rack on several bikepacking trips and found the design and functionality to be outstanding. My only negative comment was that the top bag was not removable. So, when Tailfin announced the launch of the Journey Rack that replaces Tailfin’s eight-year-old Alloy Rack, I jumped at the chance to put it through its paces on my GAP/C&O trip.
What’s so cool about the new Journey Rack? Beyond the ability to remove the rack top bag, it is versatile and durable enough for daily commuters and also works for bikepacking adventures. Now you can use it on virtually any bike in your stable, including a full-suspension mountain bike.
Redesigned and Re-Engineered
Have gear from other companies? The new Journey Rack supports panniers, top bags, cargo cages, and almost anything that can be strapped down. No longer do you need to invest in a whole Tailfin ecosystem; use what you already have.
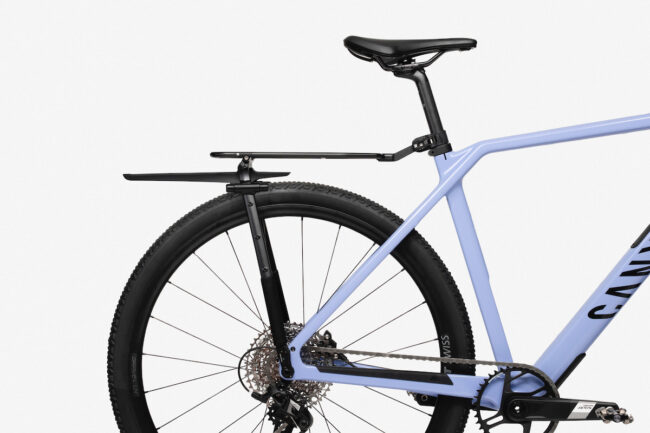
Every major component has been re-engineered by Tailfin, including a stronger top deck, redesigned quick-release dropouts, more versatile mounting options, and an updated anodized finish. Key features include:
- Two versions – with or without pannier mounts
- Triple “bosses” on each side for cages
- Redesigned Fast Release Dropouts and Seatpost Connector
- Angle adjustable Fit Link front connector for best fit on all types of bikes (two versions supplied) – adjust top deck position relative to the saddle height
- Foldable for easy storage or travel
- 29 x 2.6” tire clearance (new dropouts available soon for 29 x 3.25”)
Putting the Journey Rack to the Test
Assembly of the Journey Rack was pretty straightforward and took about 15 minutes from out of the box to mounting on my bike. If you don’t already have the Tailfin thru-axle installed, installation time will be longer since there’s an extra step.
Initially, the company shipped the rack with the wrong dropout rubber bushings for the quick-release dropouts. However, the company quickly rectified the issue by shipping the correct rubber bushings to swap out, and I was in business.
Before heading off on my GAP trip, I went on a few test rides. A couple of trips to the farmer’s market and several trail rides. Attaching the rack to my Salsa Cutthroat was quick and easy. It uses the same quick-release system as the AeroPack, allowing me to use the same thru-axle. With three attachment points, the seatpost, and two dropouts, the rack installation took seconds.
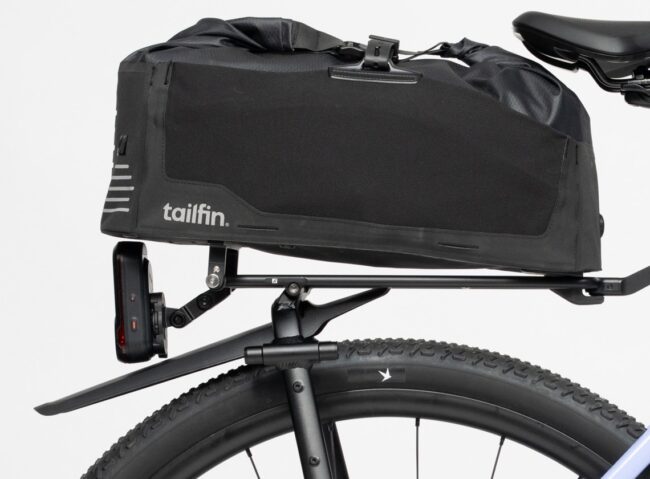
On all test rides, I also used the CargoPack rack bag, and when I needed even more carrying capacity, I added the Tailfin 22L panniers. The rack never rattled or shifted, allowing me to ride without worrying about whatever I was hauling on the rack behind me.
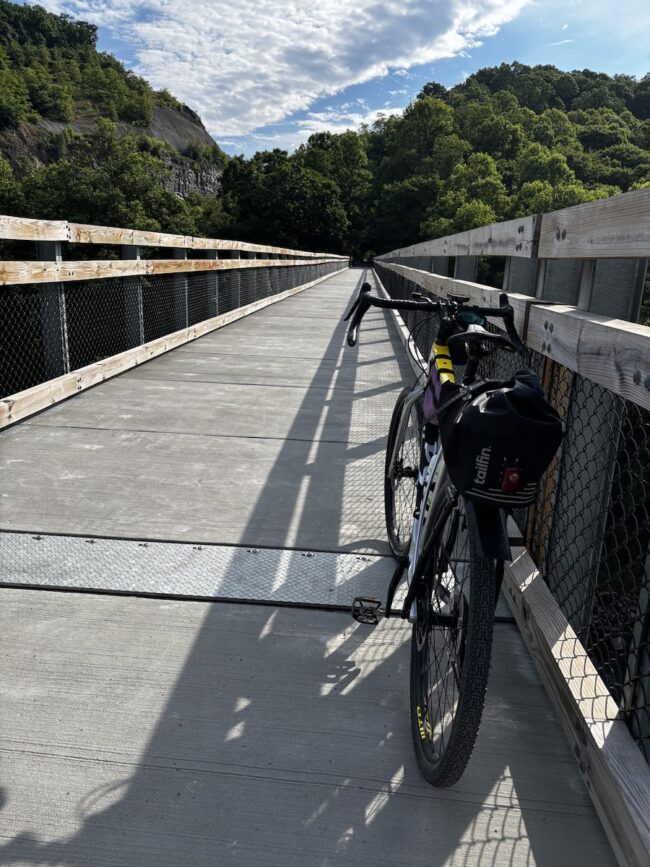
While on the GAP and C&O trip, since I only had to carry supplies for the day, I left the panniers at home. I really like that the Journey Rack folds down for a smaller footprint, making it easier to store or pack in the car.
On the last day of my trip, it rained overnight, leaving the C&O towpath with water-filled potholes and muddy in places. The optional rear fender kept the underside of the CargoPack from getting wet and muddy, while also eliminating a rooster tail.
The CargoPack is 100% waterproof and offers plenty of storage, making it the perfect size for carrying a cable and lock, a day’s worth of nutrition, a rain jacket, and an SP Connect power bank. Outside pockets made it easy to quickly access a trail map and snacks. Since the pack was easy to remove from the rack, it made it convenient to take it into a restaurant without leaving it on the bike.
Bottom Line
Tailfin is synonymous with high-quality bikepacking gear, and the new Journey Rack is a fine example of this. Its versatility is ideal for cyclists with multiple bike types (commuter, gravel, MTB) who want a single rack system that integrates with them all. It also works with bags from other brands, allowing you to leverage what you already have.
I’m a big fan of Tailfin gear and know I’ll get many years and miles of adventures from their products.
Sheri Rosenbaum regularly contributes articles and reviews products for RBR. She’s an avid recreational roadie who lives in the Chicago area and a major advocate for women’s cycling, serving on the board of directors and volunteering with the Dare2tri Paratriathlon Club. Click to read Sheri’s full bio or visit her web site sunflowersandpedals.com.

For some bikes this Tailfin Journey Rack and CargoPack Rack Top Bag may not be a good idea, but it depends on the weight being carried in the bag and the bike. For credit card touring or commuting where all you need is 5 to 20 pounds of gear this system could work.
Having done touring, on a bike made for touring, that the higher the load is the more unstable a bike could become, and it could shimmy, and depending on the bike and the speed it could shimmy a lot. This is due to increasing the center of gravity higher than the bike was built for, in fact not even touring bikes are made to handle a load that high up. It could be ok if you only put 25 pounds total of gear and rack plus bag, and I say could because there is no guarantee that even a total weight of 25 pounds won’t shimmy, it will depend on the particular bike.
Here’s how the physics plays out:
Vertical stiffness: Tailfin’s carbon or alloy arch resists torsion well, so the bag won’t sway.
Fore–aft leverage: As the bag’s weight increases, the moment (force X distance) arm behind the axle grows. That shifts the bike’s center of mass rearward, reducing front‑wheel traction and making shimmy more likely.
Frame and seat post flex: if the bike has thin seat stays, and long seat post will amplify oscillations.
Tailfin’s 70.55‑lb rating refers to structural capacity, not handling practicality. It means the rack won’t break under that load, but the bike’s dynamics will change dramatically long before you reach that number. Most riders I researched found that 20 to 25 lbs. on top is the upper limit for stable handling. A person should pack the heaviest items on the bottom of the bag and lightest on the top of the bag to reduce the center of gravity weight as much as possible.
If you want to push heavier loads, you’ll get better results by moving weight lower using side racks and panniers. Adding a small front load to rebalance steering could also help. Using a stiffer seat post or shorter one to reduce flex might work. Some people might want to add a small handlebar bag with about 5 to 8 pounds of stuff inside but even with those you have to be careful because a handlebar bag is higher up, once again raising the center of gravity. On my touring bike I had to remove my handlebar bag that had a total weight of 10 lbs. from the bars and mount it onto the top of a porter rack because on the bars my front end shimmied, on the rack it didn’t shimmy. Other bikes may not be affected with the handlebar bag on the bars.
These types of imbalances that cause shimmying can drive you crazy, but a person simply needs to remember the center of gravity rule, and depending on the bike, where the load will go. My touring bike does best with about 75% of the weight I carry, including my weight, on the rear, whereas some bikes prefer 60% on the front! So, there is experimentation involved when trying to ride a bike with a load.
My touring bike is not the most expensive one on the market, mine was only a $1,400 bike at the time of purchase, so the bike was probably not made as well as a $4,500 touring bike might have been made.
The only rack that I know of that mounts the rear panniers the lowest is Tubus Logo Evo rack, it also mounts the panniers a bit rearward to prevent heel strikes when riding.