Bike Hitch Rack Problem-Solvers

Jim’s Tech Talk
By Jim Langley
For the last two episodes, we’ve been talking about hitch racks. First, was a review of the innovative new Cycle-On from Saris, followed by reader “Jim’s” recommended rack from Kuat, called the Beta. This week, in response to several comments that came in, we wanted to cover some of the accessories that can make using and living with a hitch rack easier.
3 Problems
What readers mentioned most (including comments from past rack reviews), were 1) that hitch racks are too heavy to lift and move around; 2) that the weight (and on some racks, the bulk/size) makes them difficult to put in the hitch on the car; and 3) that even when the rack is finally started into the hitch, it’s a pain having to move it around and see what you’re doing to align the hole in the rack with the hole in the hitch. And this has to be done or the hitch pin won’t fit in.
In case you haven’t heard the term, the “hitch pin” is the essential safety device that ensures that the rack can’t fall off if it loosens. It’s a metal rod that passes through the rack and hitch. There are different types including hitch pins with locks to help stop thieves.
3 Solutions
Moving the rack around
One of my favorite features on the Saris Cycle-On rack in the review a couple of weeks ago (link above), was that it had built-in wheels. This solves the problem of not being strong enough to lift and carry a rack to mount it on the vehicle. And, even if you can lift the rack, rolling it instead means you’re less likely to hurt yourself. Because hitch racks can have protruding parts like trays and arms in all the wrong places.
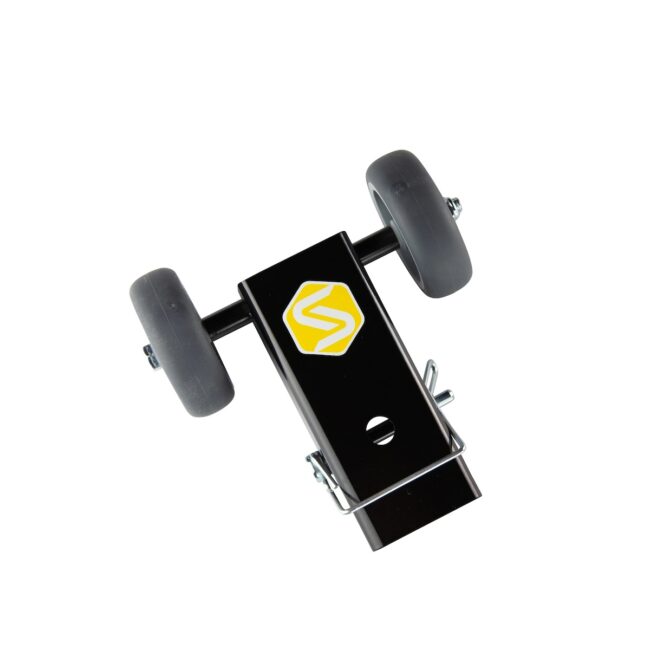
For hitch racks without built-in wheels, the good news is that rack companies Saris and Hollywood make wheeled devices that the rack goes into to add rolling convenience to any hitch rack. Saris calls theirs the Rack Dollie ($49.99). It’s so small that you can take it along and store it anywhere.
Hollywood’s solution is their Rack Valet ($99.99). It’s more like a cart with 4 wheels, which adds stability since the rack will balance on the cart.
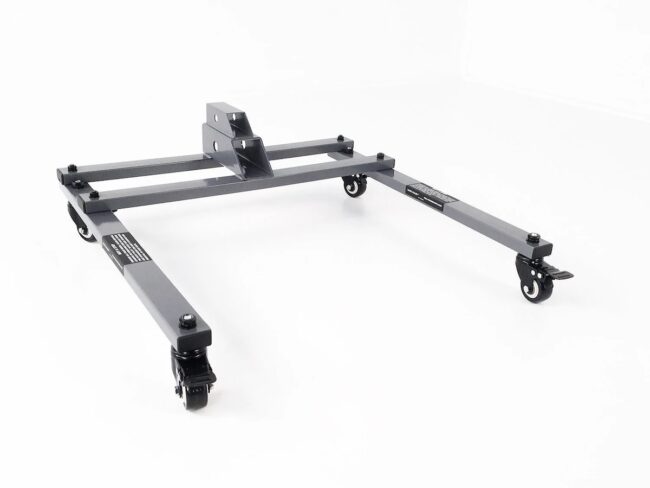
I’ve used the Rack Valet since 2017 and I leave a rack in it when it’s stored in the garage because it makes it so easy to move the rack around.
Lifting the rack
Even if you can wheel the rack to the vehicle, the rack has to be lifted to get it into the hitch. To find something to do the job, I did a little searching and found a device from the RV industry by a company called
Hitch Rack Pro, which they call their Pro Hitch Rack Dolly – Rack Lift (it’s currently $399 as of September 13, but the site shows $499 as the regular price).
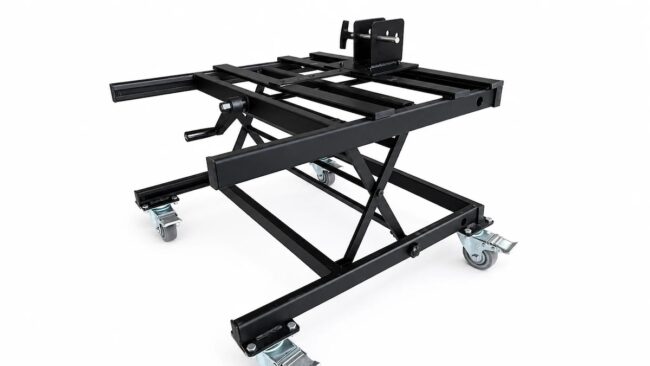
This dolly includes a wheeled cart so that it both rolls the rack to the vehicle and raises it to align it with the hitch. There’s a hitch-like holder, too, to keep the rack in place. It looks easy and safe to use, and just like the wheeled devices from Saris and Hollywood, it provides better rack storage too.
The only thing is that it costs more than some complete hitch racks. So I looked a bit more and found that if you search on the phrase “jack for lifting bike racks,” some jacks made for lifting motorcycles show up that sell for around $70. Here’s an example: https://amzn.to/4r8ZS2v.
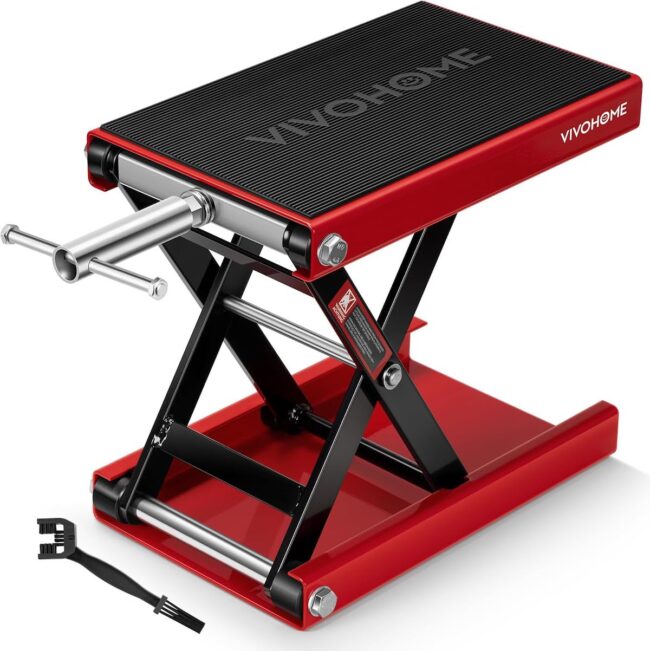
These fold down low enough to get the rack on top. However, the trick will be balancing the rack with one hand as you crank up the jack with the other. It might require figuring out a way to clamp the rack to the jack before lifting it. You definitely do not want a rack to fall on your foot or anything else, so if you try this be careful. If it works, please let us know.
Maybe some rack engineers will see this column and it’ll inspire them to build a lifting feature into some of their future racks. It would be a great thing to have.
Aligning the rack
The last problem, aligning the hole in the rack with the hole in the hitch, is one of the easiest to address. A simple solution is to install the rack in the hitch and insert the hitch pin. Next, use an indelible marker to trace a line on the rack, so that the line is right at the end of the vehicle’s hitch.
Now, when you insert the rack, you know where the line needs to be for perfect hole alignment. If you get it right, the hitch pin will go right in. The problem is, that the only thing stopping the rack going in further is you, and it’s not so easy to stop the rack precisely when you’re lifting and pushing at the same time.
So I looked for other solutions and I found one. It’s another product from the RV industry. It’s called the Hitch Pin Alignment Collar ($25.70) from the company Etrailer here: https://www.etrailer.com/Hitch-Aligners/etrailer/e98942.html. It’s a clamp that goes onto the rack so that as you insert the rack it stops when the holes are aligned. You can’t push the rack in any further so there’s no tug of war necessary when inserting the rack.
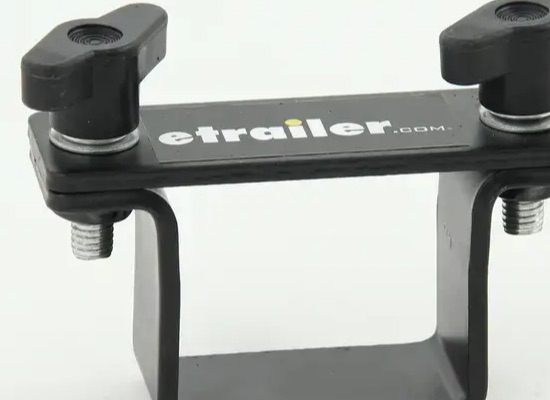
I haven’t tried the Hitch Pin Alignment Collar so I don’t know if it will work on every rack and hitch combination. But I have bought accessories from Etrailer and trust the company.
Looking at how their device functions, it occurs to me that you might be able to copy the idea by attaching a heavy duty zip tie around the rack instead? As long as it was tight enough to stay in place, it would probably stop the rack at the right point just fine too – and cost a lot less.
Here’s hoping these rack tips are helpful. If you have more to offer please share them in a comment. Thanks!
Jim Langley is RBR’s Technical Editor. A pro mechanic & cycling writer for more than 40 years, he’s the author of Your Home Bicycle Workshop in the RBR eBookstore. Tune in to Jim’s popular YouTube channel for wheel building & bike repair how-to’s. Jim’s also known for his cycling streak that ended in February 2022 with a total of 10,269 consecutive daily rides (28 years, 1 month and 11 days of never missing a ride). Click to read Jim’s full bio.
