
By Jim Langley
The idea to provide tips for keeping your carbon fiber bicycle frame and other parts safe and looking good came from a question my new Spokesman Bicycles teammate, Chris, asked on our Wednesday torture session. We’ve been doing 5-minute intense intervals up a hill every hump day at 4:30 p.m. for 10 years now. Chris is one of the new guys and already dusting us old guys.
The best part of the workout is the end, when we gather around a bus stop bench and gab. Last week, Chris asked me to inspect a small paint chip that he’d fixed on his new Trek. He wanted to know if he’d done a good job touching up the ding And then later asked for some more tips on carbon care in an email.
To help Chris and you keep your carbon bicycles and components safe and beautiful over the years, I’ve put together a few tips below that fall under 9 main categories. I’ll start by explaining how Chris made his chip disappear, because he did a swell job.
Dealing with paint chips
Carbon fiber is really tough and the things that cause paint chips and dings shouldn’t damage the frame structurally. They can be ugly, though, so it’s satisfying to fix them.
Tip: It takes a cut, gash or crack in carbon to weaken it and lead to failure. As long as there are no signs of structural damage like crushed or frayed carbon, the frame/component should be fine. If you’re not sure, get an expert opinion from your shop mechanic. Or if that’s not possible, contact carbon repair experts, such as Calfee Design’s.
Depending on the size of the chip, you might be able to simply clean the area (and knock down the edges around the chip) by gently sanding with extra-fine sandpaper and wiping with a benign solvent like isopropyl alcohol (“rubbing” alcohol).
Then use a small brush to add thin layers of paint until the chip is filled (if you don’t have factory touch-up paint, try nail polish, which comes in endless colors). Let each layer dry and gently sand and smooth the repainted chip area with extra-fine sandpaper between coats. Stop when the chip is filled. Sometimes that’s all it takes. You may want to add a clear coat to make the finish match the frame better if it’s clear-coated. Note that you can also do it with spraypaint, though for that you’ll want to mask the surrounding area.
Tip: It takes a little practice to get a good result touching up paint chips. Take your time and if you don’t like how it’s looking, simply wipe the area clean with the solvent and start again. You’ll get the hang of it after a few tries. It’s easier if you use thin rather than thick paint, too.
Wax it
A great way to keep carbon bicycles and components looking great is by keeping them waxed. And it couldn’t be easier. Just spray some furniture polish (I use Lemon Pledge) on a rag and wipe it on all your carbon and buff it off with a soft cloth. This only takes about 5 minutes and makes a world of difference.
Tip: Hold your breath when spraying because polish can make you start coughing like crazy.
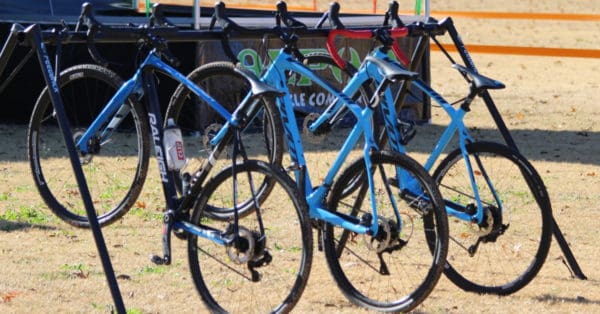
Store it safely
The key thing to keep in mind when parking your bicycle is to place it so that it cannot fall over and so that no one can smash something into it – like by opening a car door into it in the garage. Identify any hazards and avoid them. If you decide to lay the bike down (so it can’t fall over), be sure it’s in a safe place and won’t get run over! And lay it down on the non-drive side.
Tip: If you hang your bike to store it on a hook(s), it’s perfectly fine to hang it by one or both wheels even if the wheels have carbon rims. The carbon is plenty strong enough to take it. Just don’t do chin-ups on it (joking!).
Use great care transporting it
Lots of carbon bicycles (steel and aluminum, too) have gotten trashed inside cars and on vehicle bike racks. Make sure that bicycles laying on top of each other can’t bang together by putting a blanket between them. Likewise put pads between bikes on rear racks so that if they swing they can’t hit each other.
Take special care with vehicle racks that hold the bike by clamping the fork (front wheel removed). When mounting and removing the bike, fully loosen the clamp mechanism and lift the bicycle straight up and off the clamp. Never pull sideways with the fork still in the clamp or you could bend or break the fork ends. One way this happens is from losing your balance because you’re reaching too far to remove a bike from a roof rack. So, be sure you can reach bikes comfortably before trying to take them off.
Last, avoid the exhaust pipe(s)! This is only a concern with rear-mount racks. The issue is that they can place the bicycle so that the hot exhaust is directed right at the bicycle and it can literally cook whatever it hits. Make sure your bikes are held well away.
Shield it
Here are a couple of nice products for adding clear protective layers to your carbon to safeguard it against hazards. You can place it beneath the down tube, for example, to shield the carbon against debris thrown at it from the front wheel. Or on the chainstay and bottom bracket to guard against chain hits or a dropped chain. It also works to protect against housing rubbing and scratching the paint.
- Shelter Bike Frame Protection Tape, $29.99 per kit
- Crankskins, $9.99 to $15.99 for frame kits and $11.99 for their Crankskin model that covers the crankarms to protect against heel rub, etc.
Tighten right
Unfortunately, lots of carbon bicycles get damaged from overtightening components. You can wing it with steel and aluminum parts and usually do no harm. On carbon, you need to know the recommended torque and use a torque wrench when tightening. Park Tool’s new Adjustable Torque Driver is a good example.
Clamp it carefully in repair stands
If you work on your own rig in a bicycle repair stand, use care how you clamp it. It’s best with carbon bicycles to clamp the bike by the seatpost (even if it’s a carbon post). And regularly inspect your clamping jaws to make sure they haven’t hardened or picked up any grit that can bite into the carbon. If the jaws aren’t compliant and safe anymore, replace them or wrap the seatpost with a section cut from an old innertube before clamping.
I have a few more carbon care tips in a longer article on my bicycle website here: http://jimlangley.net/wrench/carbonbicyclecare.html
I hope these tips help keep your carbon in great shape! If you’ve got more tips, or some tales of woe of how your baby got damaged, that we can all learn from, please share them in the comments below. Thanks!
Jim,
I’ve got an old ( ok, vintage ) cf Mongoose Mt Bike that has a joint failure where the bottom bracket shell inserts into the down tube and has pulled away. It is not so loose that there is play or movement and the gap is only about 3-4 mm but I am worried that the frame is now unsafe to ride. Intuitively, I think it is or getting there, and also that any repair would involve removing the lug from the down and seat tubes which could, and most likely, would render them unusable. Ever the optimist and loathe to abandon a great ride, I am wondering how unsafe and if it can be fixed. Best, MS