
By Rick Schultz
![]()
Hot!
- Environmentally friendly
- Longer lasting
- Easier cleanup (inside of tire)
- Corrosion inhibitors
- Seals punctures up to 6mm (1/4”)
- 150ml bottle has adapter for application directly through valve
- Can use for tubeless tires or squirt into tubes
Not!
- None Identified
https://www.squirtcyclingproducts.com/portfolio_page/squirttyresealant/
Price MSRP: Samples provided in GREEN below
- 150 ml – $12.50
- 1 liter – $39.75
- 5 liters – $139.00
Source: Bike shops, Websites
Features: Ammonia free, longer lasting, easier cleanup
How obtained: Manufacturers Sample
Summary: Multi-sealing using latex, micro-fibers, and bead block granules.
Where It All Started
I was introduced to SQUIRT (squirtcyclingproducts.com) when they first announced their long lasting Chain Lube product. I was asked to test chains using lubes in 3 categories (1) SQUIRT – a liquid wax-based lube, (2) conventional popular lubes such as ProLink and (3) motor oil such as Mobile1. I was given both Dura-Ace and Ultegra chains. Testing took more than a year since I collected data for each type of chain and lube. Results were documented every 200 miles and I used a dial-caliper to measure “chain stretch.” Using conventional lubes, I was getting an average of 1,500 miles per chain before it was considered worn out. When I started using Squirt, the mileage immediately more than doubled to 3,200 miles before being worn out!
When Squirt asked me to look at their new tire sealant, I jumped at the chance!
Initial Thoughts
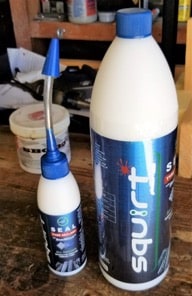
Squirt tire sealant comes in 3 sizes options, 150ml, 1L, 5L containers. The small bottle can be used with tubeless tires as well as preventing tubes from flatting. A flexible clear plastic tube is included that fits easily over a Presta valve stem. You can also use on Schrader valve stems, but, after use, the end of the filler tube will be too loose to fit over a Presta. A solution is to just snip the end off.
The clear plastic filler tube measures at 7mm (0.276”) OD and 5.5mm (0.217”) ID so if you need more, you should be able to find something at a Home Depot or Lowes.
Table 1. Recommended Applications
| Tire Size / Type | Recommended Volume |
| 29” MTB | 100-120ml |
| 27.5” MTB | 80-100ml |
| 26” MTB | 80-100ml |
| Gravel | 70-90ml |
| Road | 60-80ml |
Installation & First Impressions
As you can see in the photo above, 2 bottles arrived, the 150ml and the 1 Liter. Actually, there is a small 30ml bottle shrink wrapped to the 1 Liter bottle. The 30ml bottle is small enough to take with you on a ride.
Referring to Table 1, 30ml is probably the right amount that can be used in an emergency. But, talking to many other cyclists using tubeless tires, most recommend taking a spare tube along with you as well.
Tubeless Vs Tubeless-Ready
Last year, I wrote an article on tubeless tires, Hutchinson to be exact. Part of the discussion was the difference between tubeless and tubeless-ready. Per Hutchinson, tubeless tires contain a butyl lining on the inside of the tire, tubeless-ready tires don’t. Although the butyl lining makes the tire heavier, it can easily be patched on the inside using a standard tube repair kit. The tubeless-ready cannot. Therefore, some cyclists take along a patch kit as well.
Initial Install
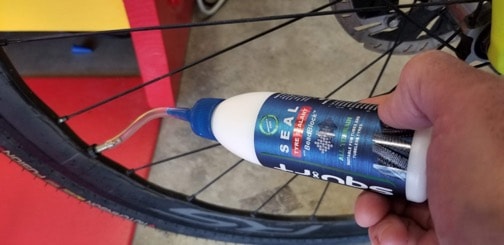
Each of the 3 sizes use a different process in administering the tire sealant. For the 30ml travel size, you will need to remove part of the tire (my personal choice is Pedro’s Plastic Tire levers), pour in the bottle then reseat the tire. For the 150ml size, it is recommended to use the clear plastic tube (as pictured above). For the 1,000ml and 5,000ml sizes, its best to pour the desired amount into a small cup then pour the contents into the tire while installing them.
Most cyclists tend to have a hard time with (a) seating ‘overly-tight’ tubeless tires onto the rims and (b) initial inflation of the tire.
For overly tight tires, the following two ideas can help. 1) Place the tires in the hot sun for an hour. This will help make the tires more flexible. 2) Place some of the tire sealant onto your fingers and rub onto the inside of the rim as well as on the inside of the tire bead. This will act as a lubricant to not only make getting the tire onto the rim easier but also will help seat the bead during inflation.
For initial inflation, it’s all about getting a lot of air into the tire real fast, otherwise, you end up pumping and pumping and pumping and pumping and pumping without getting anywhere. For inflating, there are 3 methods that are known to work; (a) CO2 cartridge, (b) air compressor and air hose, or (c) using a special shop floor pump like the Topeak Joe Blow Booster pump specially designed for effectively mounting a tubeless tire. I have options (b), and (c) available to me.
TIP: For added insurance against flats, many cyclists use tire sealant, bring along a spare tube and a tube repair kit.
How Did the Sealant Work?
As you know, flats are random, but they do tend to occur more at different times of the year. Winter rains tend to wash glass and those small pieces of steel wire from tire radial tire blowouts out of the driving lanes and right into the bike lanes. Also, towards the end of summer, goat head thorns are in ‘full bloom’ and are a thorn in the side for most cyclists. This is where tire sealants shine for keeping you riding.
In the 3 months using the sealant, I only ran over one small piece of steel wire which would have been a slow leak. I didn’t even notice it since the sealant stopped the leak with very minimal air loss.
Summary
I’ve tested other brands of tire sealants and some have been good, and some not so good. Squirt is one of the good ones.
Most of my wheels are Shimano and I have several pair that are tubeless. I read a tech memo one time that cautioned about several products on the market that caused corrosion inside of Shimano tubeless wheels. I got to see this firsthand when a friend came over asking me to help him remove his worn out tire for a brand new one.
After prying off the rear tire, it was almost completely filled with old brown latex. I wondered “why brown?” I immediately gave him the task (and screwdrivers) to dig out all of the old latex, especially from under the bead of the rim. This is the area of the rim where the hook-bead of the tire ‘snaps’ into the rim holding it in place. This channel was completely filled with latex as well.
I told him “you really want to clean that up good since any latex left around won’t allow the tire to hook completely into the rim. About 45 minutes later, the rim was clean AND rusted. He used one of those tire sealants that end up corroding the inside of the rim. One of the first things I looked for in the Squirt literature was did it have corrosion inhibitors. And yes, it does! A positive thing.
Other good things are environmentally friendly, longer lasting and yes, easier cleanup.
Overall, I am very satisfied with this product.
Good to know about anti rust inhibitor.Thanks Rick !
I used Stan’s latex sealant on my mtb aluminum wheels a few years ago and it ate out around the valve core hole. Ruined a good set of tubeless wheels but I continued using them with tubes until I got a new mtn. bike. I don’t use Stan’s anymore. I”ve been using the orange sealant but I’ll try this stuff if it last longer and works as well.
David L.