
Jim’s Tech Talk
By Jim Langley
Last week’s Tech Talk was about Seth’s road tubeless flat, what may have caused it and how to refresh/add sealant to tires. If you missed the story, here’s a link: https://www.roadbikerider.com/road-tubeless-safety-tip/.
Today, we’re continuing the conversation because the comments that came in were evenly divided between tubeless-loving and hating roadies. We’re sharing a couple of good tubeless tips from the comments, pointing out some things about tubeless that are sometimes missed or misunderstood and sharing another tubeless flat mystery from a reader.
To start, “Pete” and “Brian” asked for more details on what caused Seth’s flat.
Pete wrote:
“It seems to me that Seth’s diagnosis of the source of his problem (lack of sealant) can’t be correct. Am I right in saying that lack of sealant cannot cause an air leak – it just won’t be able to seal an air leak that was caused by another source, like burping, or a puncture from an object, i.e. things caused by external forces, not lack of sealant?
So what really caused Seth’s leak? Did he pick up something while banking into the turn? I’d be more concerned that maybe his tire might not be properly sized to his rim. What do you think?”
And, Brian asked:
“While burping is not uncommon with low-pressure off-road tires, it seems really unlikely that it would occur on higher pressure road tubeless tires, assuming that they’re properly inflated. Did Seth indicate whether he had checked his tire pressure before the ride? Starting out with low pressure could result in burping, but it still seems unlikely during normal riding and cornering.
Did he say what tires and rims he has? There are still compatibility issues with road tubeless that you don’t see with off-road tires and rims. A poor fit is another likely cause of sudden air loss.
Did he check the tire to see if there was any evidence of sealed punctures? Perhaps he had a leak that lowered his tire pressure during the ride, before the sealant plugged it (I know he mentioned “lack of sealant,” but does that mean he didn’t have any or was it just in need of renewing?).
Seth replied:
“Allow me to elaborate as to why I think it was a lack of sealant. First, Pete, size was not an issue, I’ve been running 700 x 25mm Conti GP 5000 tubeless. I’ve been using tubeless only for 7 years. My mistake on this ride was not reacting to a different sound I heard riding over some gravel on the tarmac.
I had topped-off the pressure before the ride. Visually, all looked good with the front tire. It did not feel like it was losing pressure, but I must have hit an expansion or rut which knocked the remaining air out just before the sharp turn where it flatted and I went down.
When I got home and inspected the tire here’s what I found: No puncture, the valve was intact, no sealant (!), the tire never lost its seal with the rim (that’s a first — great wheels) and I was able to blow-up the tires by hand, checked for leaks with a spray bottle and all was good. Not what I expected.
So, by the process of elimination I concluded it was the lack of sealant exacerbated by burping, etc. Whatever the case, I should have known better and stopped after hearing unfamiliar sounds. No question this was user-error. Let me know if you have further questions.”
Thanks for providing more details, Seth!
Your Tubeless Tips
Zip Tie Dip Stick Sealant Level Checker
“Rod” shared this one,
“For me, personally, vibration induced joint pain is the limiting factor on the duration of my rides. I love tubeless because it allows lower inflation pressures – a godsend for arthritic hands.
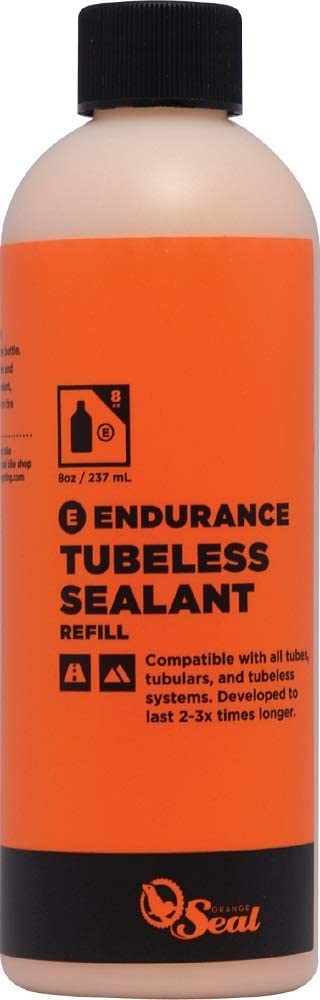
Road Tubeless technology has improved significantly since my 1st (unsatisfactory) experiences over a decade ago. About 5 years ago, I discovered the combination of Compass Tires (now Rene Herse), and Orange Seal https://amzn.to/3hNacKB , thanks to my LBS.
Since then, I’ve ridden tubeless with ALMOST no problems on multiple bikes. I did have a bad crash when my rear tire ‘burped’ on a fast gravel descent. Upon examination, there was no sealant left in the tire. It had been about 4 months since my last ‘top-up’. Now I set a calendar reminder to check sealant levels every 3 months.
However, I’ve also noticed that the rate of sealant evaporation varies greatly between tires/wheels, and seasons. Consequently, I measure sealant levels prior to ‘topping-up’. This is easy. To do it,
- Elevate the wheel and remove the valve core. But then, rotate the tire so the valve is at the 6 o’clock position
- Then, clean the valve (I use a pipe cleaner)
- Now insert a small plastic zip-tie (black is best). The Zip-tie is your ‘dip-stick’ – they have tiny horizontal ridges which catch the sealant – and provide an unambiguous visualization of sealant level. That helps guide the amount of sealant I need to add to each wheel (usually closer to 1 ounce than 2)
While this appears complicated, after a few cycles the entire exercise on 3 bikes takes less than a half-hour (including wheel inspection and light cleaning).”
Do This to Prevent Valve Clogs
“Robert’s” tip:
“To help avoid the sealant forming a skin over the valve clogging it, I turn the wheel so the valve is at 12 o’clock when I get done riding.”
Great tips, guys! Thank you!
Tips For Tubeless Flat Repair on the Road
Since several commenters mentioned the hassles of trying to fix tubeless flats on the road, I want to make sure anyone considering tubeless road tires understands that there are ways to reduce them.
Give the sealant a chance to work
Some seemingly bad tire cuts can be sealed by the sealant if you give it a chance to do its job. I once sliced my rear tire such that the sealant shot out and into the face of the guy drafting me. We both stopped and I started to remove the rear wheel when he said, “Wait, let’s see if it stops the leak.”
We were both surprised that in about 15 seconds the leak stopped. The tire was too soft to ride on so I had to pump it up, but I was able to pedal home safely. I did have to clean the sealant mess off my bike.
Carry a tubeless repair kit (plugs)
A lot of the hassle of fixing tubeless punctures comes from removing the wheel and tire and installing a tube. This requires dealing with any remaining sealant plus struggling to reinstall the tubeless tire with a tube inside and then more difficulty trying to seat the tire. You can still ride on it even if it’s not seated but it’ll be a bumpy ride.
Fortunately companies such as Dynaplug make relatively easy to use tools for patching tubeless tires. These work like car patch kits and let you push a plug into the hole in the tire to seal it. The beauty of these tools is that there’s no need to remove the wheel or tire. Dynaplug even makes a kit with a built-in CO2 pump that can add air if you lost some when you flatted.
Here’s my test of a Dynaplug tubeless repair kit showing how it works. I first mounted a new tubeless tire with new sealant and the Dynaplug worked great. With it – and probably a little practice – you have a good chance of fixing a tubeless flat much faster than you could fix a tubed tire flat.
Rick’s Mystery Tubeless Flat During Haute Route
I want to share Colorado roadie Rick’s full story because it involves another tubeless sealing issue all tubeless riders should know about. And because it happened during one of the bucket list events many roadies dream about, Haute Route.
I’ll let Rick take it from here:
“I was riding in the Haute Route Pyrenees event on tubeless tires a few years ago. I arrived at the stage finish on the summit on Couraduque after descending Tourmalet and found my front tire squishy and soft. Hmm… I thought. I borrowed a pump from Mavic, pumped it up and descended Couraduque back to the hotel. Once there, it was soft again. The mechanic supporting our group and I inspected the tire (it was locked solidly on the rim), added sealant to be sure, pumped it up and left it overnight. It was perfectly fine when we checked it in the morning. I proceeded to climb Tourmalet in the opposite direction that day and it was fine at the summit.
I “bombed” the descent and when I made a hard right on the last turn at the base I almost crashed. The tire was completely flat. It was still locked solidly on the wheel (no gaps in the bead) and the fact that the tire did not come loose from the rim most likely was the primary thing that kept me from crashing. I found a pump in the town, pumped it up again and it was fine to the finish at the summit of Portet. No way I was descending on it again so I took our support van back down to our hotel. We took the wheel to the Mavic service techs that evening with an explanation of the issue (our bilingual mechanic made sure they fully understood the issue).
We picked up the wheel later that evening. The Mavic folks said they took it apart and couldn’t find any issue. Oh, something was wrong and there was no way I was going to continue riding that wheel! Fortunately, our support team had a spare front wheel that I used for the rest of the 7 day event.
When I arrived back home in Colorado, I took the wheel to Wheat Ridge Cyclery (my go-to shop in Denver) for their inspection and assessment. They called me a couple days later and said the issue was a loose spot in the rim tape that was only causing a problem when high lateral forces, such as descending fast through switchbacks, were placed on the tire/rim. In those situations, the loose tape was allowing air to “burp” out through the spoke holes; hence, no visible symptoms such as a loose bead. They re-taped the wheel and were good enough to test it themselves with several high speed descents of Lookout Mountain. I’ve had no problems with it or tubeless tires since…”
Thanks for sharing, Rick – I’m glad you did not crash and that the Wheat Ridge Cyclery techs were able to find and fix the taping issue.
Taping tips
Rick’s experience shows the importance of proper rim taping, another part of tubeless tire setup. It’s something that’s a lot easier to get wrong than to get right, unfortunately.
This might be because people assume it works just like regular rim strips/tapes and you just put it in place.
But, tubeless rim tape has a completely different job than tubed tire rim strips/tape. It’s there to seal any holes in the rim. In order to do this, you must choose the correct width tape for your rim so that it sufficiently covers the bottom of the rim and all the holes in it.
And to install you must ensure the tape is fully stuck to the rim all around and there’s no way that air or sealant can get beneath the rim tape. To do this, you must first clean the rim and then take care applying the tape, pressing and pulling to prevent any air bubbles underneath it and make sure the tape is stuck completely so it can do its job. If there are any gaps, loose spots or air bubbles under the tape, the tire will usually leak and you’ll have to try again.
Tube tip
To close, thanks tubeless users for sharing your stories and best tips. And, you roadies sticking with tubes in your tires, thanks for sharing your reasons for doing so and your tube tips. I’ll let “Dave” have the final tube word since it’s all about saving money – and who doesn’t like that?:
He says,
“I’m currently using Sunlite #63741 700 ×18-23c Presta tubes available on eBay. I buy quantity 50 for $113 with free shipping. The valves are threaded 48mm and work fine on my 40mm carbon rims. Any larger rims would not work with this length stem so be careful.”
Great one, Dave. Thank you!
Jim Langley is RBR’s Technical Editor. A pro mechanic & cycling writer for more than 40 years, he’s the author of Your Home Bicycle Workshop in the RBR eBookstore. Tune in to Jim’s popular YouTube channel for wheel building & bike repair how-to’s. Jim’s also known for his cycling streak that ended in February 2022 with a total of 10,269 consecutive daily rides (28 years, 1 month and 11 days of never missing a ride). Click to read Jim’s full bio.
re tubeless:
Burp crashes?
Mystery flats?
gaps
, loose spots
air bubbles
tape
sealant
glue
NO THANKS
With tubeless:
1. How much does the fluid weigh that goes into tire?
2. When you have to remount tire is it a tedious cleaning of the inside of rim so old fluid wont interfere with bead seating.
3. If you do get a flat that sealant won’t seal does all the sealant spray out all over your components?
Thanks for the info.
Thanks for the questions, Mike.
1. Ballpark figure as it depends on amount and type, but it’s about 60 grams for enough sealant to put in a road tubeless tire (about 2 ounces)
2. Fluid doesn’t interfere with bead seating when putting on new tires. It’s a liquid not a solid so it doesn’t get in the way. But, yes, if you have old sealant that’s still wet you will either want to leave it in the tire or dispose of it before adding the new sealant when putting the tire back on. Old sealant left in will add weight of course as will dried blobs inside the tire. Also note, that there are two ways of putting sealant in – when the tire is mounted you put it in through the valve. You can also put it in when the tire is half mounted and then finish mounting the tire. If you put in through the valve then the tire is already mounted so you don’t have to worry about losing/spilling/making a mess with sealant when finishing mounting the tire.
3. Yes, if the sealant squirts out and you’re riding down the road the sealant can squirt onto your frame, your bike, into your face, for rear leaks it can get on your shorts and back, your legs, the rider behind you, and so on.
However, usually the sealant seals the flat before you even know you had a flat. And, I have only had one flat that the sealant could escape and squirt all over the place with. I also haven’t been on any rides where someone else’s tubeless tire did this. So, I believe it’s not that common a thing to happen.
Hope this answers your questions, thanks again!
Jim
FWIW, I use half that amount of sealant and it works fine.
Tubes seem so much less hassle……yes, there are advantages to tubeless…..but, I will continue to use tubes.
Absolutely, tried it on mountain bike and even there the amount of set up work and maintenance hassle just seems ridiculous. Back to tubes for me.
Another problem is there are just too many modes of failure, this not only makes reliability a problem, it also
makes diagnosis of problems difficult – as demonstrated so very well by this article.
I am 70 years old. I weigh 165 lbs. I ride for exercise not competition. I use Mavic Kysrium wheels with Yksion pro tires. I average between 5k and 6k miles a year at 16mph. I switched to tubeless tires about 4 years ago. I won’t go back to the old clincher style. In four years Ive had the occasional minor puncture that the sealant handled allowing me to continue riding. One time I had a puncture big enough the sealant couldn’t repair.
I used my Dynaplug device to patch the hole and added a little air and was on my way. I didn’t have to remove the wheel, dismount the tire, and patch the tube and then remount the tire and reinstall the wheel. I carry only the Dynaplug a tiny bottle of sealant and a mini pump to top off any lost air. And no the tire doesn’t come off the rim. Any sealant spray is easily cleaned off components. In the old days when I used tubes I would have 120lbs pressure in the tires. With the tubeless set up I run 85lbs. providing a much more comfortable ride. I will admit that the initial setup of the tubeless system gave me second thoughts. Tougher to install than clincher tires.But if you think about what you are doing when you add sealant you have a mess like I did on my first try.
The sealant can be injected into the tire by removing the valve stem core (simple process) and is neat and clean. The tire doesn’t have to be dismounted and sealant poured in. So, a smoother ride, easy on the road repair, and no need to carry a bulky tube and repair kit frankly I don’t understand all the wining complaining. Fifty tubes at a time! It used to take me ten years to use fifty tubes.
I would never use a so called tubeless compatible rim that needs tape to seal it!
As proven in this article, it’s just a disaster waiting to happen.
I have one set of tubeless rims and at the moment I have tubeless tires on them. Once this tires are worn out, I’m going back to tubes.
With such a small volume of air and high pressure in road wheels, you lose air so fast when punctured,I just don’t think the benefits are worth the hassle!
Thanks
Bryan
Thanks for the feedback, Bryan. Most tubeless wheels require taping to seal the spoke holes. There are rims without spoke holes and those you can run tubeless without taping, but if there are no spoke holes it’s not as easy to build the wheel or to deal with any broken spokes, so those no-hole rims are nowhere near as common as tubeless setups with spoke holes in the rim and those are taped.
My friend Scott bought a pair of wheels from Light Bicycles and his wheels used their tubeless rims without holes. I inspected those wheels (very nice) and did a YouTube video about it. In it you’ll find links to the wheels he bought and more information about them: https://youtu.be/ZO2svtr32tU
And in regards to losing air, the role of the sealant is to stop any leaks. So with tubeless if it’s working properly you usually don’t experience significant air loss when you have typical small glass or wire punctures.
Thanks again,
Jim
Re: Dynaplug: Great video, but if the tire is really flat how can you possibly insert the plug without bottoming out on the rim? Looks tough enough with an inflated tire.
Thanks a lot, Gary, I’m happy you enjoyed my video. Usually when you put the plug in the tire is not flat. But, if it is flat, you are pushing the plug in at an angle so while you might bottom out, you can avoid it if you’re careful. Also, the tip of the Dynaplug is blunt and designed not to damage the rim tape or rim.
In my testing, though, I have never not had some air in the tire. If a tire gets cut so badly that it is flat, then your hope is that the cut isn’t so large you can’t get several plugs in it. If so, then you are probably going to have to put a tube in and even boot the tire.
Hope this answers your question and thanks again!
Jim
I recently realized that the only times I had problems with tubeless is when the tire was set-up by a mechanic that is not skilled in tubeless.
When the shop shifted my bike to a savvy mechanic who was skilled with tubeless technology and embraced it, I rode two years and thousands of miles without being sidelined with a flat. After he left the shop and when I had them install a new set of tires, the problems return and their ignorance about taping/etc surfaced.
I found a new shop with experienced mechanics who service athletes and other serious cyclists, and my tire problems are gone. I started out skeptical about tubeless, but I’ve become sold on them. I just need to work with a shop that understands taping and the nuances of tubeless.
Thanks for sharing your experience, Randy. There is an awful lot you have to know and fully understand to setup tubeless correctly. But, the same holds true for tires with tubes and sew-up (tubular) tires, too. Your point is a good one, though: if you’re going to pay to have your tubeless tires setup be sure to ask a lot of questions to determine if the person doing the job really knows their stuff. You’ll want to know as much about your tubeless wheels and tires as they do probably, too.
Thanks!
Jim
Everyone has their own experiences and opinions. I can’t see myself going back to tubes unless that’s all that’s available. I’ve been running tubeless on both my road and Mtn. bikes. On my road bike for last two years with no problems. except on one of my regular group rides last year someone had thorn tacks on the road. As the group rode thru the tacks 5 of the six of us got flats. Some one & some two flats. All the other guys were running tubes except me. They all got flats but except me. The tacks were stuck in my tires but did not flat. The front had two tacks. They all had to change out their tubes. I left the tacks in until I got home (35 mi. later) before pulling them out. As I pulled them out the air did seep out a little until they sealed off. I’m still riding on those tires today. Have not had any more flats on them. Don’t know how many flats I might have had if not for the sealant. I’ve been running tubeless on my mtn. bikes for probably last eight years. I will say tires have gotten a lot better in the last couple years than they had been previously. They can take a lot more abuse these days plus run lower pressures, corner better and a lot less flats. I can’t recall the last time I’ve had a flat on my mtn. bike. It’s been several years and then I just added a plug, aired back up and kept going. Most people run tubeless on mtn. bikes but the few that still do are still having flats and are running higher pressures making for harsher rides. Kinda like going from mechanical shifting to electric shifting and going from rim brakes to disc brakes. I’m an old guy that’s been riding a long time and most all the new technology makes riding more enjoyable. If you don’t know what you’re missing then you just don’t know.
Thanks for sharing your positive tubeless tire experiences, Clint, appreciate it.
When discussing/debating tubeless bike tires I like to remind folks that none of our cars have tubes in the tires and no one gives it a second thought. The proponents of tubeless technology had that vision in mind when they first introduced the technology and they’re still striving with new designs to match that almost flat-free standard.
Thanks again!
Jim