Bikepacking Gear Roundup – Part 1

One of my goals for this year is to try bikepacking. I lean toward credit card camping (aka hotels, motels, BnBs), but I haven’t ruled out sleeping in a tent. Either way, a multi-day adventure will have me carrying gear on my bike.
I currently have two exciting adventures planned. A three-day trip in Wisconsin on the 400 State Trail to the Elroy-Sparta Trail. Then, a four-day trip along Missouri’s KATY Trail (read about my 2016 KATY Trail adventure). In the past, I’ve ridden both trails, but this will be my first foray into bikepacking.
I’ll be using my Salsa Cutthroat since it’s perfect for gravel and bikepacking. But you can enjoy a multi-day adventure on virtually any bike. Companies have developed a variety of bags that don’t require mounting points; instead, they attach using straps to the bike frame, saddle, and handlebars. Another option is to use a cycling backpack or trailer. However, one thing is certain—I need to learn how to pack lighter.
Below is part one of a list of items I’ve discovered while building my arsenal of bikepacking gear. Most of the items I’ve done minimal testing on, but stay tuned for more thorough reviews once I’ve put the gear through its paces.
If you are looking for additional resources, the League of American Cyclists, in conjunction with Bikepacking Roots, recently hosted a Bikepacking 101 webinar, which offers valuable information and sources.
Tailfin
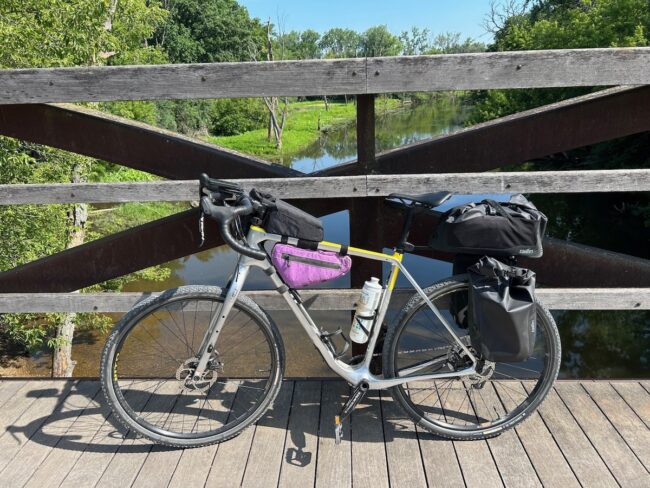
Price: $610 – AeroPack Cargo– Carbon with pannier mounts; $140 ea – 16L Mini Panniers, $30 – Laptop Holster; $70 – Universal Thru Axle, $30 – Adjustable Light Mount
Weight: 1000g (with Fast Release Dropouts and Pannier mounts), 570g (16L Mini Pannier)
Waterproof: Yes
AeroPack Bag Dimensions: 165mm x 430mm x 420mm (rear)/380mm (front)
16L Pannier Dimensions: 260mm x 440mm x 190mm
Availability: Online
How Obtained: Company sample
RBR Advertiser: No
I spent a considerable amount of time at the Tailfin booth during Sea Otter Classic, where the UK-based company showcased its line of commuter and bikepacking gear. Unfamiliar with the brand, James Bracey, the company’s Head of PR, Communications, Riders, Community, and Events, walked me through their line of bikepacking gear.
I was impressed by the engineering and thought that went into every detail, resulting in exceptionally well-made, durable, and simple-to-mount and use gear. While the gear is on the pricy side, it will serve you well, lasting for many, many adventures to come.
On display at Sea Otter was the new waterproof AeroPack Cargo, integrated with the rack, which allows for expandable storage and quick access side pockets.
One negative of the bag is that since it’s integrated with the rack, you can’t detach just the bag. Instead, you must detach the rack and the bag from the bike. If you want to be able to detach the bag, consider a different Tailfin rack system instead.
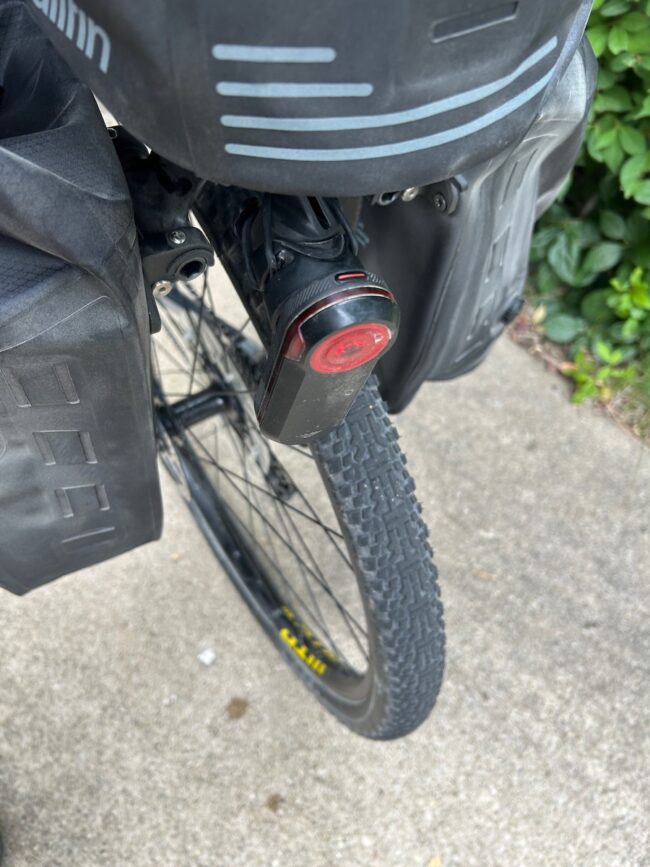
After a lengthy discussion, James hooked me up with an AeroPack Cargo bag, featuring a carbon rack and a pair of 16L panniers. To use the Tailfin system with my Salsa Cutthroat, they included a thru-axle for mounting the rack, an extended seatpost connector to add clearance and prevent my inner thighs from hitting the bag, and an adjustable light mount for a Garmin Varia radar.
Assembly
Minimal assembly is required to attach the AeroPack to the arch and seat post clamp. The videos on the Tailfin website were valuable since I learn better visually with instructions. All the bolts included torque specs, as I assembled all the pieces.
The rack requires a special Tailfin thru axle when using the quick-release clamps. I had some trouble figuring out how the derailleur hanger nut and thru axle worked, so my LBS helped out.
Test Rides
My first test ride was to the local farmer’s market. There was plenty of room to stash my purchases before heading back home. I had to keep feeling behind me to make sure the rack was still in place, as it never shifted, rattled, or bounced. It was like it was one with the bike.
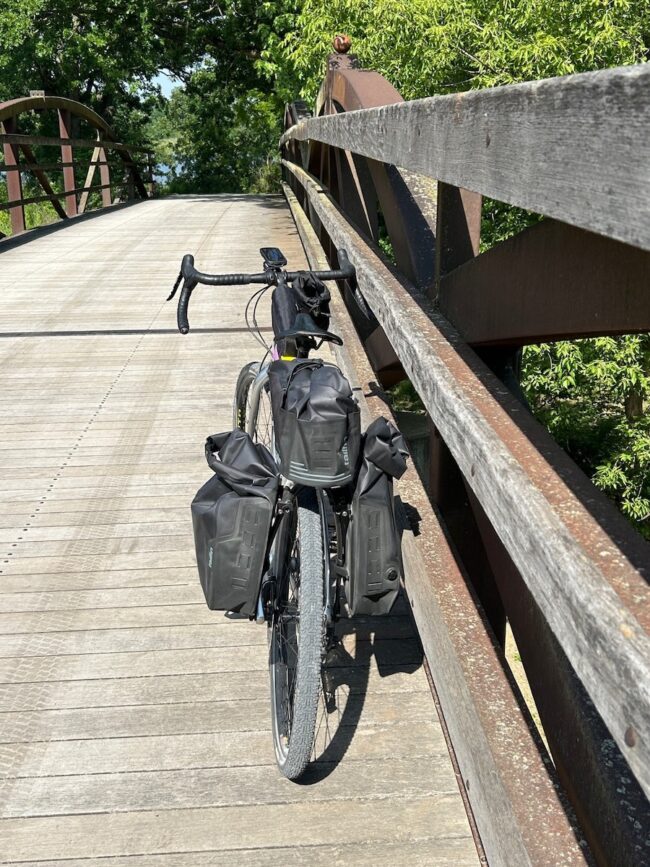
The second test ride was 40 miles on a local crushed limestone trail. I placed a bunch of random objects in the AeroPack and panniers to simulate cargo. This time, there were strong winds, and I was pleasantly surprised that the setup was very aero. I never felt the wind pushing against the rack, and again it never rattled, bounced, or shifted even when crossing railroad tracks.
If I could change one feature of the AeroPack, I’d like a lighter colored interior fabric. The black interior makes it difficult to see items in low-light conditions, especially when camping at night.
In a couple of weeks, I’ll be heading out on a three-day bikepacking adventure. It will be a good test for my minimal packing skills and the Tailfin system. I will provide a comprehensive review of the rack upon my return from the trip.
Also, check out the Marginal Gains Cycling Podcast from April 18th at Sea Otter. At the 37:31 minute mark, they discuss Tailfin, Lachlan Morton, and AeroPack.
MSR Hubba Hubba™ Bikepack 2-Person Tent
https://cascadedesigns.com/products/hubba-hubba-bikepack-2-person-tent
Price: $579.95
Packed Weight: 3 lbs, 12 oz.
How Carried on the Bike: Handlebars
Floor + Vestibule Dimensions: 29 + 17.5 sq ft
Max Interior Height: 42 in
# of People: Sleeps Two
Optional Accessories: Universal Footprint protects the tent floor ($46.95)
Availability: Online
How Obtained: Company Sample
RBR Advertiser: No
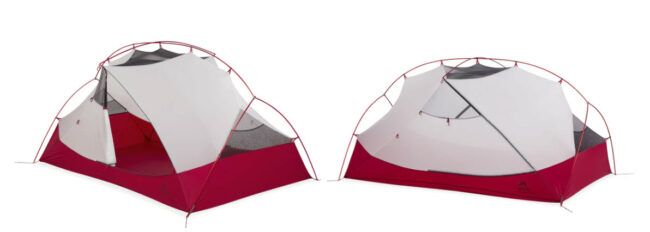
At first glance, you can tell a bikepacker designed the Hubba Hubba tent because of its cycling-specific features. It has a large footprint when set up, but is also small and lightweight enough for the waterproof bag to fit easily on flat or drop bars.
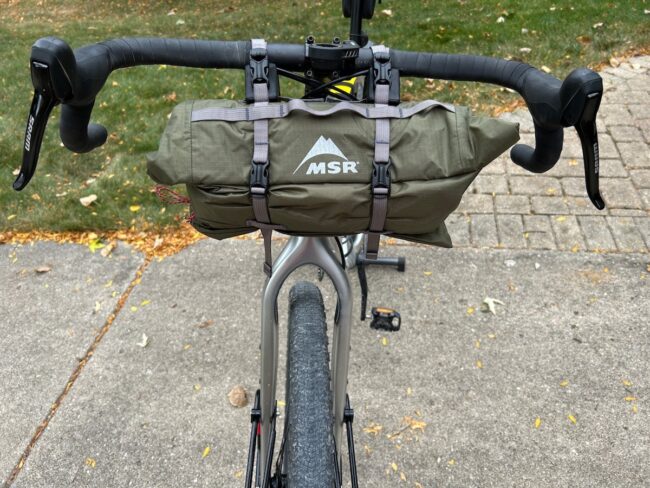
The initial setup was quick and easy, but I wish there were a second person, as the poles can have a mind of their own. But after setting it up for the first time, I learned a few tricks which made it easier the second time.
Once set up, I noticed the tent had a rectangular floor. Most hiking and bikepacking tents narrow at one end. However, the Hubba Hubba two-person tent fits two air mattresses side by side. Additionally, with 42 inches of headroom, sitting up in bed or getting dressed is no issue.
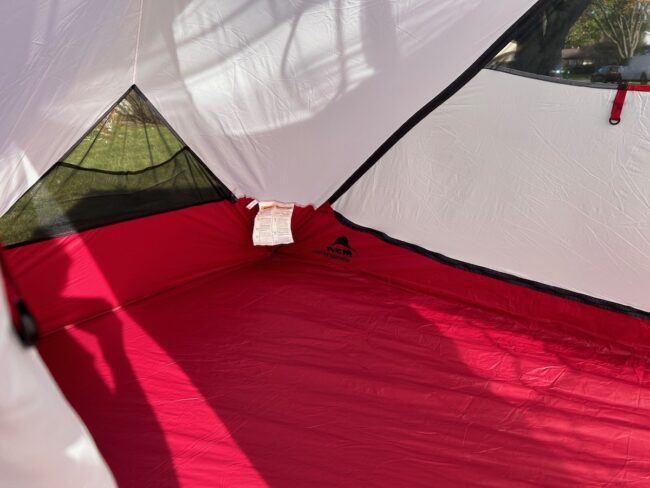
Other interior creature comforts include corner tech-friendly pockets with cable ports, mesh and solid fabric for ample airflow, large overhead gear loft pockets, and an interior clothesline (optional exterior clothesline, too).
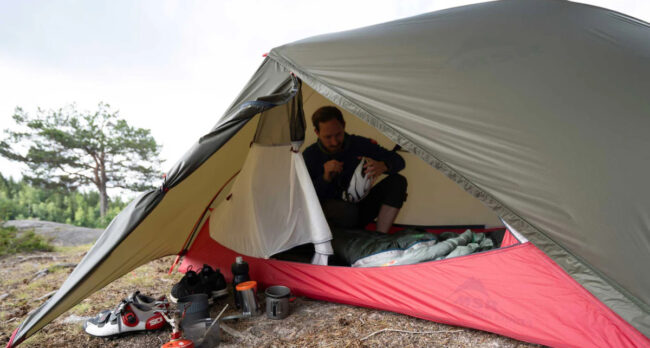
The included rainfly, made of 20D ripstop nylon, protects you from the elements. It boasts extra-large vestibules for storing cycling gear, and the doors feature StayDry rain gutters to prevent water from dripping onto your gear.
What’s included?
Waterproof handlebar bag, tent body, rainfly, poles, eight stakes, guidelines, pole bag, and stake bag. The optional Universal Footprint, priced at $46.95, protects the tent’s floor from sharp rocks, moisture, and other elements. I have this on my wish list.
MoosePacks
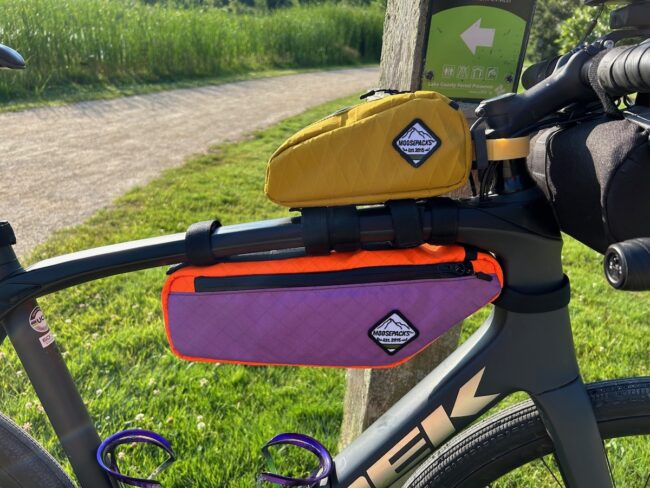
Price: $80 (top tube bag); $120 (frame bag large or small)
Dimensions: 8″L x 2.5”W x H4” (top tube bag); 14.5”L x 2”W x 5.5”H, Approx: 2.6L (large frame bag); 13”L x 2”W x 4”H Approx: 1.7L (medium frame bag)
# of Straps: 3 (top tube bag); 4 (frame bag)
Colors: Black, BlueRidge, Edgemont, Lilac, RedFern, SunnySide, Teal
Closure: Zipper
Availability: Online or Retail
How Obtained: Company sample
RBR Advertiser: No
Whenever someone on the Unbound Gravel Participants Facebook page asked, “What’s your favorite bag?” a resounding majority answered, MoosePacks. This family-owned brand was new to me, so I made sure to stop by their booth at the Unbound Gravel Expo. It was there that I met Matt Moosa and his wife, who have been designing and making bike bags since 2015. Located in Boone, North Carolina, their line offers bike bags for commuting to multi-day bikepacking trips.
Perusing the made in the USA bags, I appreciated the fun colors, high-quality materials, and meticulous craftsmanship. After Unbound Gravel, Matt sent me a top tube bag and a large frame bag to test.
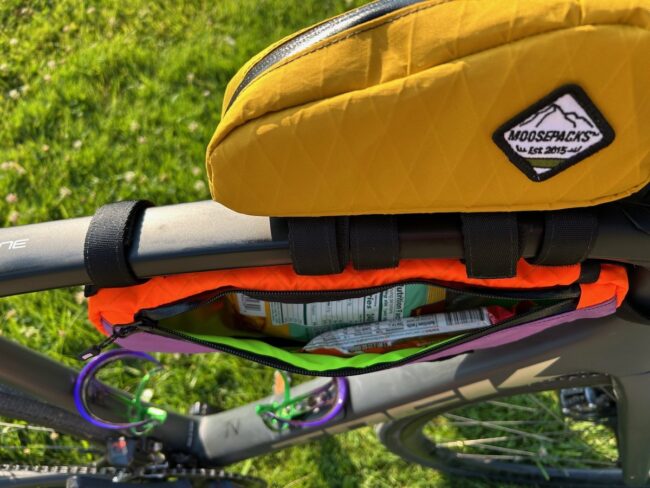
The bags come in a variety of colors, allowing you to adorn your bike’s frame in contrasting or matching colors. I like contrasting and went with the lilac and orange frame bag. Both bags have a bright green interior lining, making it quick and easy to find items.
Top Tube Bag
Bag installation is simple, and the daisy chain webbing along the bottom allows you to choose where to place the two Velcro straps that attach to the top tube. The bag’s structured panels give it rigidity, so it did not shift during rides. Additionally, the zipper pull is easy to grasp for effortless one-handed opening and closing. There’s an opening at the front of the bag to route charging cables to your light or GPS unit without having to leave the bag open.
Inside the top tube bag is a small side pouch to stash money, credit cards, or an ID. Another nice feature is a clip inside the bag to prevent accidental loss of your keys.
Frame Bag
Available in medium or large sizes, like the top tube bag, the frame bag also features structured panels. The positioning of the three top tube straps, one head tube strap, and one down tube strap can be anywhere along the webbing. The bag features two exterior zipper pockets, one on each side, with the right pocket capable of holding the largest volume of gear or even a water bottle.
Like the top tube bag, there’s an opening to fish charging cables through to your lights or GPS head unit.
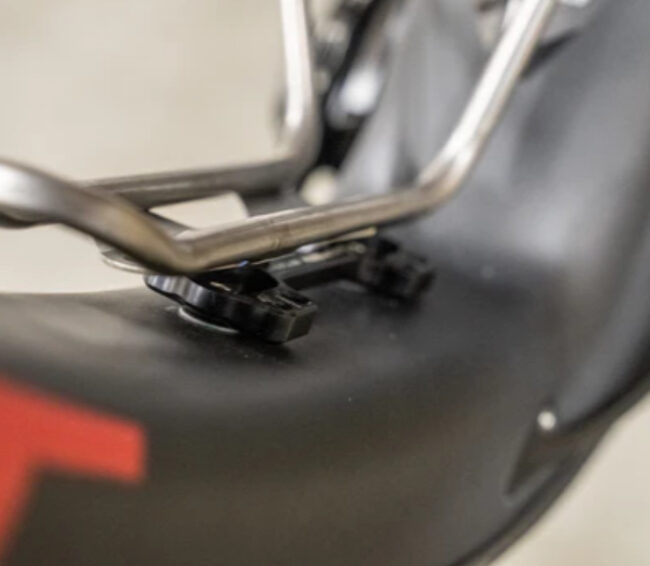
Is your bike frame too small that you can’t fit a frame bag or water bottle? Or trouble fitting a larger water bottle on the downtube? Well, check out Wolf Tooth Components’ B-RAD Bottle Shift system for $19.95. Use the B-RAD to shift the bottle slightly off-center, tilting it outward to improve clearance.
Stio Pinion Down Pullover Jacket (men’s and women’s versions)
https://www.stio.com/products/womens-pinion-down-pullover
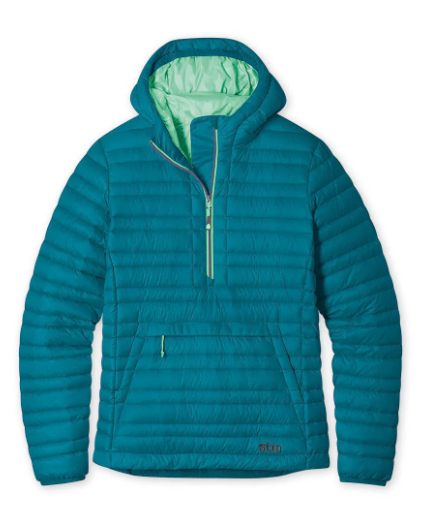
Price: $289
Colors: Abyss, Cedar Blush, Terrain, Mountain Shadow/Blue Heron, Deep Lagoon
Sizes: XXS to 2XL (women’s); S to 2XL (men’s)
Fit: Relaxed fit
Weight: 10 oz.
Outer Material: Recycled Pertex® Quantum® shadow ripstop, 20 denier shadow ripstop, 100% recycled nylon
Insulation Material: AlliedFeather™ HyperDRY™ water resistance finish, 90/10 White Goose Down
Availability: Online or Retail
How Obtained: Company sample
RBR Advertiser: No
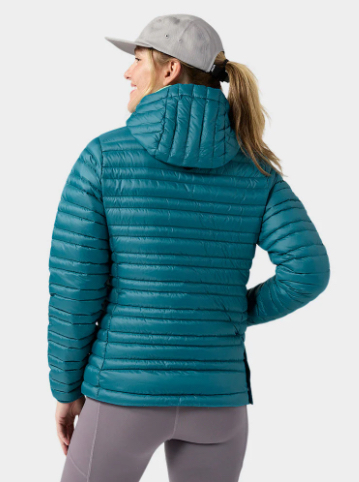
For when the early mornings or late nights get a bit chilly, Stio’s new Pinion Down Pullover Jacket is perfect – lightweight (10 oz), packable, and warm. The front kangaroo pocket keeps hands warm, and the front zippered pocket is ideal for a cell phone or wallet. The pocket also doubles as a stuff sack, turning the jacket into a soft, camp pillow.
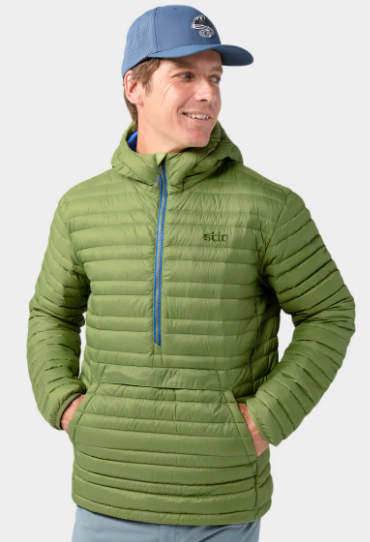
The relaxed fit is perfect for layering over a t-shirt with a long-sleeved sweater. Should you need a little more room, there are two snaps at the right hip to expand the bottom hem.
The hoodie’s outer layer is made of Pertex Quantum, which is designed for maximum strength while remaining lightweight and soft. Made from 20D nylon and featuring a PFAS-free DWR finish, this product offers excellent wind resistance and water repellency. The shadow rip creates the look of traditional ripstop fabric but without the raised weave for a silky smooth feel.
AlliedFeather™ + Down’s water-resistant technology, HyperDRY™, is the result of years of research and development to create the hoodie’s insulation. According to the company, proprietary nanotechnology treatments create the longest-lasting PFAS-free, water-resistant down on the market—meaning you stay warm longer in the wettest conditions. You can feel good about wearing this jacket, as it’s made from bluesign® approved material, which meets the most stringent sustainable production standards.
Stio is a Jackson Hole, Wyoming-based company that produces high-quality, innovative outdoor gear with sustainability in mind. This hoodie is my first experience with the company’s gear, and I’m very impressed. It is high quality, comfortable, and performs well in various conditions. I love it and will include it on my upcoming bikepacking trip gear list.
Stay tuned next week for part two of my bikepacking roundup. Have you had experience with any of the gear mentioned above? If so, drop a comment below.
Sheri Rosenbaum regularly contributes articles and reviews products for RBR. She’s an avid recreational roadie who lives in the Chicago area and a major advocate for women’s cycling, serving on the board of directors and volunteering with the Dare2tri Paratriathlon Club. Click to read Sheri’s full bio or visit her web site sunflowersandpedals.com.


I hope you enjoy your tour in Wisconsin. If you had the time you could continue on the La Crosse River Trail and the Great River Trail all the way to beautiful Trempealeau County.
Hi Doug,
We are talking about riding part of the La Crosse River Trail on our second day. This trip is limited in time.
Appreciate the suggestions!
I too started with “credit card camping” and never thought I could make the jump to real camping at 60 years old. But, I did get there and at this point, I greatly prefer it. You will find that camping greatly expands your flexibility since you are not always needing to begin/end at a lodging location and it allows you to be much more “off grid” or at least away from the hustle and bustle of urban areas. Just make sure you get a really comfortable sleeping pad. I’ve been really happy with the Big Agnes, Boundary Deluxe, Insulated Sleeping Pad. That makes or breaks the camping experience.
Hi Alex,
Thanks for the note. I’ve tent camped all my life, but as I get older, the creature comforts are important. But I never say never. Appreciate the pad suggestion. I do have one coming from Therm-a-Rest to test. These new pads are definitely far superior to what I used years back.
Great article, as always there are alternatives to any camping gear, not that those alternatives are better or worse, just different.
I went with a Mountain Hardware Nimbus UL2 tent that is about 2.2 pounds, and costs $420 but I got it on sale for $320, but it doesn’t come with anyway to strap it onto the handlebars, so you will have to buy a pair of straps and do it yourself; I use two Voile Straps and mount it to the side of my Blackburn Portier rack down low next to the fork blade, then my camping chair goes on the other side, this helps keep my center of gravity lower vs putting it on the handlebar, but I’m not going off road so I’m good doing it that way. However the Porter rack weighs quite a bit, so I lost the weight race, but I needed a place to strap that crap and the sides of the Porter rack are for that purpose.
My panniers are larger to hold more crap for several weeks to months on the road.
I tried a few air matteresses but the Klymit Insulated Static V Lite Eco Sleeping Pad, seems to work the best for me, and it weights 20 ounces I think.
I have a handlebar bag, but it’s strapped to the top of the Porter rack and not on the handle bars, again due to center of gravity.
I have a small top tube bag for my toiletry crap strapped to the top tube.
All great suggestions. Thanks for sharing.