Swapping Out A 172.5mm Ultegra Crankset For A 170mm ROTOR Crankset

By Rick Schultz
Step 1
Remove pedals. Most road bikes use an 8mm hex wrench but there are some older models that use 6mm and still some that you need a 15mm pedal wrench.
NOTE: Non-drive side is reverse threaded.
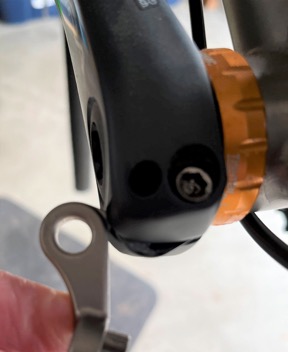
Step 2
Loosen both non-drive side pinch bolts.
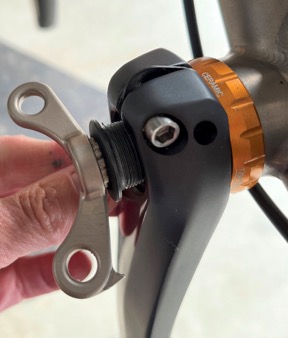
Step 3
Unhook the locking plate
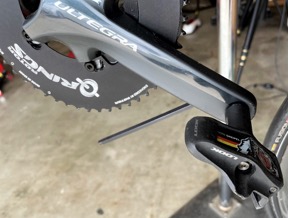
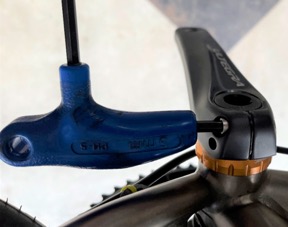
Step 4
Remove the crank arm fixing screw, also knows as bearing pre-load adjuster.
Step 5
Now you can remove the non-drive side crank arm.
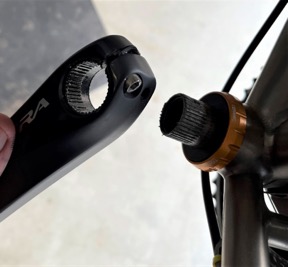
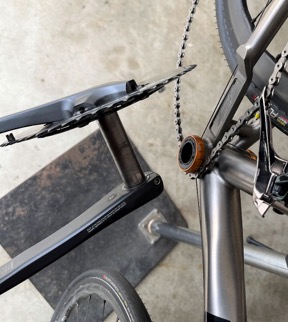
Step 6
Now you can remove the drive-side. Should pull straight out but sometimes needs a little tap from the other side with a rubber mallet.
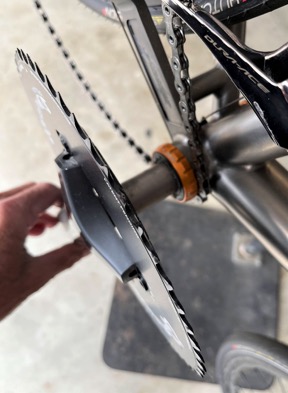
Step 7
Crankset completely removed. All that should remain (intact) is the bottom bracket and bearings.
Step 8
Put the crank back together so you don’t lose any of the pieces. Wipe it down / clean it up then put away to reuse later or resell.
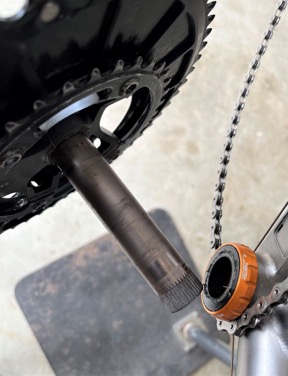
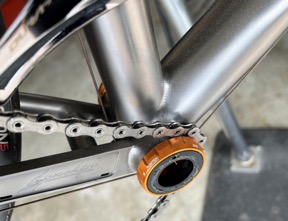
Step 9
This is what the bike should look like after removing the crankset. Since you now have access to the bottom bracket area, clean it all up spic and span!
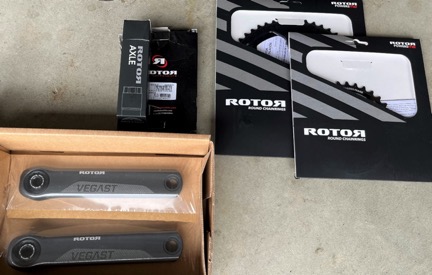
In part 2, we will be installing a Rotor VEGAST crankset with 24mm axle – https://rotoramerica.com/collections/road-cranks/products/vegast-24 (a 30mm axle version is also available), which is a modular crankset comprised of the crank arms, spider, axle and chainrings.
Rotor also makes the ALDHU crankset. The differences? The ALDHU is lighter but at twice the cost of the VEGAST. Look, feel, form, fit function are the same, just the weight is different. The cranksets come in two options, depending on the Spider, you can opt for either 1-piece dual chainrings or more conventional individual chainrings. I chose the individual chainring option, since
- I can pick my chainrings sizes – all my road bikes have 52/34. You can only get the 52/36 in the one-piece
- Rotor was out of stock on the 1-piece
SNEAK PEEK – here is the kit I ordered…
Coach Rick Schultz is an avid cyclist who has trained, raced, and coached in Southern California and now resides in Bend, Oregon where he works as a bike fitter and bike fit educator. Rick is an engineer by trade and a prolific cycling product reviewer. He’s the author of Stretching & Core Strengthening for the Cyclist in the RBR eBookstore. Check his coaching site, www.bikefitnesscoaching.com. Click to read Rick’s full bio.
