
Jim’s Tech Talk
By Jim Langley
Recently I discovered that some roadies are struggling to remove cranksets. And that the cranksets that are giving them trouble are actually designed to be easily removed. I know because I work at a company that makes some of these cranks, Praxis. Another company making cranks like this is SRAM.
Our sets are spec’d by several major makers, such as Specialized. And Specialized also specs SRAM cranksets.
The defining feature designed to make these cranks easy to remove is something I still call a One-Key-Release, which I believe is a term Shimano coined circa 1980. But the basic mechanism has been around even longer so it could have been named otherwise at one point. Today, it’s also called a self-extracting crank – which is a bit confusing since a wrench is required, removal doesn’t happen on its own. So here, I’ll stick with One-Key Release or OKR to simplify.
Why Remove Cranks?
First, in case you’ve never removed your crank, a reason to do it is to check the bottom bracket, which is the assembly inside the frame that the crank spins on. With the crank removed you can reach the bearings and other components and feel them to make sure everything’s tight, clean and the bearings still turn smoothly.
With some cranksets – and certain Praxis cranks use this design, another reason to remove the crank is to swap the chainring size or type (single to double). That’s something riders do more often now with bikes that work great on different terrain. The gearing for hanging on fast group rides tends to be a lot higher than for gravel grinding, for example.
In the case of removing cranks to change the gearing, that’s something you’d want to be able to do in a hurry. That way if your ride plans changed suddenly, you’d always be able to have the best gearing. And that’s one of the reasons cranks like this are designed to be easily removed.
How It Works
The way the OKR mechanism works is that the bolt that is tightened to fasten the crankarm (or both of them in older systems) is held captive inside the arm. Typically there’s a cap threaded into the arm on top of the bolt. The cap has a hole in it allowing access to the bolt.
This cap that’s threaded into the crankarm gives the head of the bolt something to push against. But only when the bolt is unscrewed (turned counterclockwise). Backing out the bolt like this makes its head bump into the cap and as you keep turning, the bolt pushes the crankarm off the bottom bracket axle (also called a “spindle”).
Cranks Are Press Fit On
You might wonder why you can’t simply loosen the bolt and pull the arm off with your hand? That’s because crankarms are pressed onto the axle/spindle.
This press fit on the SRAM and Praxis cranks involves a mating spline, male on the spindle and female inside the crankarm. When fully tightened, the spline and press fit ensure that even if the bolt loosens the crankarm will remain tight for some time.
“One-Key” As In Only One Hex Key
With early One-Key Releases, you used a 6 or 7mm hex wrench for the bolt. Newer ones such as these I’ve been getting questions about removing, use an 8mm. The key thing to know is that only a single tool is required. That’s part of what makes it so easy.
However, in terms of the effort to loosen and remove these crankarms, it can take a massive amount of force. They’re tightened to over 50 newton meters, which is a lot.
That’s what threw these home mechanics off. They tried using the allen because they saw that there’s a place for it in the crankarm – and also no wrench hole in the other arm. But, when they tried to loosen the bolt with the wrench it would not turn, no matter how hard they tried.
Which naturally caused them to deduce that removing the arm requires some special disassembly and tool that they needed to get.
Tips for Tight Cranks
Actually, the OKR system works easily if 1) you realize it can be super hard to loosen the bolt; and 2) if you’re prepared for battle with the right weapon and/or help! Here are a couple of suggestions:
For Praxis cranks with the system I made a video showing how to use a simple trick to loosen the bolt. Be sure to insert the 8mm allen wrench all the way into the bolt first. I go over this in the video so have a look.
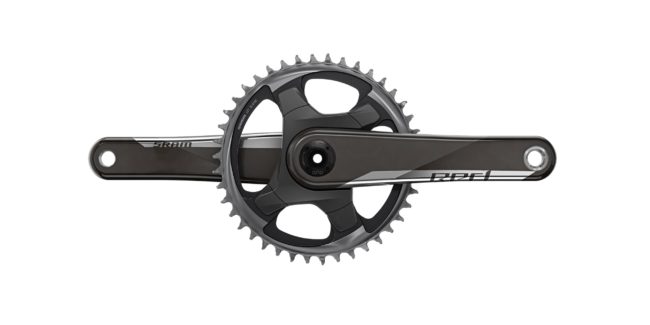
For the SRAM Red DUB crank I recently did battle with, I could not use the simple trick I show in the video. Because their One-Key Release bolt is on the right crankarm. This means that the crank turns as you try to loosen the bolt.
It makes you want to strap the crankarm to the chainstay, or an old trick is to put something solid across and through the chainstays to block the crank moving. However, with frame walls so thin on fine road bikes, that’s asking for trouble – and the bike in my repair stand was a $10K spankin’ new Specialized Roubaix. I didn’t even want to leave fingerprints on the paint.
Outsmarting the Crank Design
So, first I broke out a cheater bar to be able to gain leverage. I have one that works well and was only $10. To go with it, I also have an 8mm socket that was less than $5. Here’s that bar: https://www.harborfreight.com/38-in-drive-17-in-breaker-bar-67931.html. And here’s the socket: https://amzn.to/2Wytdq0.
Of course, if you want to use a length of pipe, that can work, too. I prefer the positive connection the cheater bar gives you.
With the cheater bar and socket in place, I stood over the bike, held the other-side pedal as tightly as possible and put all my weight on the handle of the bar to break the bolt loose. Right. Nothing happened. I kept trying, even bouncing on the wrench, and still the bolt would not budge.
I considered removing the left pedal and slipping a pipe over the non-drive crankarm to give me the leverage to resist the force from the cheater bar. But, I decided against that worried it might scratch the brand new crankarm. Also, trying to apply enough force on one side and resist it on the other myself wasn’t working.
Time to Get Help
I hate not being able to get a job done myself, but I know when I’m licked. And I also know that as far as upper body strength goes I’m as weak as a kitten. So, my next idea was to recruit Scott who runs our shipping department at Praxis.
With the two of us, he could push on the cheater bar while I held the left pedal to prevent the crank from turning under the force. It took a few tries to figure out how to best hold onto the cheater bar and pedal while stabilizing the bike to protect it.
We did finally break the bolt loose. That’s what it sounded like, too – a loud crack. But it was just the bolt freeing up, nothing breaking. And once it did, it was cake turning the bolt and extracting the SRAM crankarm.
Be Smarter than Your Tight Crank
I’ve only described two scenarios in this Tech Talk. The OKR crank you’re trying to remove could be different. If you run into one that’s difficult to remove, start by looking for instructions on proper removal.
Unfortunately, it’s getting more difficult to locate instructions on manufacturer websites. I still try there first since they’re the experts, however, if I can’t find anything in a few minutes, I give up and search youtube. It’s rare that I don’t find someone showing how to do what I’m about to try. If you have a trick for removing a tight OKR crank that will help your fellow roadies, please leave a comment explaining.
Ride total: 9,709
Self-Extracting cranks have been around for decades, I’m glad they are still around. Great design, simple and less tools needed for roadside or home repair. I’ve used a few different versions, my favorites were the Dura-Ace, Back in the day I bought a set for each of my bikes. I’ve found that a long handled 3/8 ratchet or 3/8 breaker bar works great with a 8 or 10mm hex socket perfectly in the shop. I would guess you could also use a long handle hex key. I never use any ratchet or breaker bar larger than 3/8, especially on todays bikes and parts. Since it seems that 6mm and even 5mm have gone the way of the dinosaur I try to use only 1/4 drive tools to include torque wrenches. 3/8 is really only needed for BB’s.
Thanks for always having such great articles, very good info for burgeoning home mechanics and those just wanting to understand more about how their bikes work.
If you lubricate the crank bolts before installing them and torquing them into the spindle you will not only get a more accurate torque reading, but they will be a lot easier to remove. Always lubricate any bolt before tightening; it’s one of the primary rules of mechanics.
Thanks for the tips and kind words, Kenneth. And thanks for the tip to be sure to lube bolts, Fritz.
Yes, it’s very important. Though, I should point out that both cranks mentioned here had ample grease on the threads and both were difficult to remove for the owners. They would have been more difficult to remove without the grease for sure.
Thanks!
Jim
Long, long time wrench and I have had many run ins with SRAM 1x / Red etc bolts who do not wish to give up without a fight..
I found that a standard L shape (i.e. not P-handle) 8mm hex key will work when used in the following way:
Get a Irwin quick grip clamp, insert the 8mm so that it is about 150mm above (ie above) the pedal as if you are riding it. A better description might be: if your crank is at 6 o’clock the Allen should be at 4:30 to 5 o’clock.
Use the clamp and the pedal to load the 8 mm up (it can be fiddly to get started) up to the max the clamp will provide. Most times the bolt will crack free so be ready to release the clamp.
If that still doesn’t work, take a small hammer (Park Tool HMR8 size) and give the pre loaded Allen key a sharp tap (not a Federer forehand winner..) the small impact under the load of the clamp is almost always enough to crack it!
Just be ready to grab the clamp!
Hope it helps you
Cheers!
That loud crack when the bolt broke loose makes it sound like maybe the installation had used thread locker, or it was over-tightened on first installation.
Thread locker is possible, Kerry, but all I saw when it was removed was grease – and lots of it. Often thread adhesives wear off a part though so some could have been deep inside the spindle and I didn’t see it. And, it could definitely have been over tightened, possibly by pneumatic tools at the factory. Good thoughts, thanks!
Jim
New Campy cranks spec 70 N-M to tighten. After many contortions, etc trying to hold a pedal, etc, I found it was far more effective to hold the torque wrench or cheater bar in one hand and the crank arm in the other, separated by a few degrees. Then move your hands together. The body works better that way, and the chances of injury are less when the bolt/nut breaks loose suddenly. (I do the same for removing pedals which have not been removed for a long time.)
With a crankarm tightened to 70 Nm (!!!!) – you must have Herculean strength to be able to remove it, Richard. Well done!
The tip of aligning the wrench with the crankarm to use a scissor action is a good one. In some situations, I’ve been able to use screw clamps on the wrench and part to break a tight part loose when I couldn’t get it by hand alone – though I would never try that unless the pieces could handle the force.
Thanks!
Jim
Jim – great video. I’d been looking for documentation on how that worked. Question still though – what is the purpose of the other outside nut with the cassette tool teeth? I’d assumed maybe it was the extractor – but you didn’t seem to use it during the process. I found it loose recently on my crank and tightened it to specs on ring – but still don’t understand it’s purpose?
Great question, Bob. That cap that has the same spline as Shimano cassette lockrings only has one purpose: it’s to give the bolt something to push against for removing the crankarm. Without that cap in place, the bolt would just loosen and come out and the arm would still be attached to the spindle.
One of the reasons I made the video is because people think a cassette tool is used to remove the crank and if they take the cap out, then they can’t use to bolt to remove the crank. If you were to somehow strip the threads on the bolt, you could then remove the cap to replace the bolt. But otherwise, it just stays installed in the crankarm.
Thanks for the question!
Jim
Slightly off topic, but hopefully you know about Praxis. I just bought a Specialized Creo SL Comp E5 bike which came equiped with a Praxis Chankset/Chainring. The chainring is 46 tooth, 110 BCD. I would like to change it to a 52 tooth. I have never encountered this arrangement where the chainring bolts go into threads in the chainring itself. I have not been able to find any chainring that seems to be compatible. Does Praxis make something that will work?
Thanks for the help
Good video! My comment is always try to “pull” on a tool.
If you do have to push a tool, do it with an open hand, never a closed hand.
If using a closed hand and the tool slips, you could end up with bloody knuckles.
Cheers
Shimano Hollowtech is the answer you are looking for. One of the reasons I read these columns is to know what NOT to buy, and self-extracting and pressed-fit cranks are what NOT to buy. Shimano Hollowtech solved this problem many long years ago. Hollowtech cranks are compressed to the bottom bracket axle finger tight. Two 5 millimeter bolts clamp the crank arm to the axle. My seven-year-old grandson can produce enough torque for removing or installing Hollowtech. What could be simpler? And yet, here we are, a step backward.
I know you are in the business of solving problems the industry throws at us, and for that we are grateful, but perhaps you could explain why self-extraction and pressed-fit are superior to Shimano’s Hollowtech.
It now occurs to me that you could launch a whole series of articles concerning what is easy to fix for a home mechanic and what is a nightmare. You could start with the press-fit and self-extracting cranks versus Hollowtech. Other topics that come immediately to mind are internal cable routing, tires that should fit rims they are specked for but don’t, gizmos with rechargeable batteries that aren’t replaceable, tubeless tires and sewups, and master links versus chain breakers. You could do another series of articles on what are throwaway items or not., Judging from the pace of change though, your hands are probably already full. I will continue to vote with my purchases.
There are some steps to Remove Your Bike Crank Without Actually Using a Puller.
First, twist and turn all bolts counterclockwise to loosen and remove bike crank nut or bolts, remove all washers.
Use specific handwheel screws and nuts when identifying and removing handwheels.
Insert the spindle into the available slot assigned to it, twist in a counterclockwise motion, removing the puller thread from your bike’s crank.
I am very grateful to you because last few days I am seeking how to remove cranks without a crank puller. When I found your article it decreases my pressure. Now I kicked this out and can do it very easily. Your words are very easy to understand.
Anyway, I am a newbie bike rider. Hope one day I could be a good rider.
Thank you so much for shear this helpful info.
Did anyone above mention the fact that SRAM have now released and all steel crank bolt for DUB chainsets (to replace the current aluminium one) that should make this terrible binding less of an issue. I have one on order for a custom. Er and will let you know how much it helps. I will of course use lashings of anti seize on that bolt too.
Hello Jim, big thanks from a Belgian mtb’er! I tried removing my Shimano xtr m9100 cranks but, whatever I tried, I couldn’t succeed. Until I found your post. I made every ‘rookie’ mistake you described (removing cap, force needed, turning clockwise or counterclockwise). After reading your post, I managed to remove the crank set. Thank you!