
Jim’s Tech Talk
By Jim Langley
Today I tackle a tech question from a reader named Trevor. It’s a great one for new mechanics or anyone wondering if they really need a torque wrench in their bicycle tool kit.
Trevor asks:
“I was on your site and saw a picture of your toolboard. I see that you have two torque wrenches on it. A concern of mine has always been over/under torquing various nuts on a bike. How do you know what to torque each part to?
I see that Park Tool has a page of bike torque specs here https://www.parktool.com/blog/repair-help/torque-specifications-and-concepts, but each part is unique and it seems like it would take hours to get all the specs for each part on a specific bike. Do you have a general rule that you follow i.e. 10 ft lbs for all brake cable pinch bolts etc?”
How I Learned a Feel for Torque
That’s a great question, Trevor. Older mechanics like me were taught “how tight is right” by the senior mechanics who were tasked with teaching us the basics of wrenching on bikes.
When it came to tightening things, the two rules I was taught by my mentors were 1) tighten a little then test to see if whatever you tightened is actually tight. So for a stem or seatpost, which were steel or aluminum back then (early 70s), after initial tightening, I would try to move the seat or bars off center. If they moved I’d tighten them a little more until they would not move.
Rule number 2 was that if you broke a bolt or stripped a nut or a customer on a bike you setup had something come loose, you had to try hard to learn from the over or under tightening and not to let it happen again. Steel axles, axle nuts and cable anchor bolts were always being ruined by new mechanics – costing the shop money.
Not getting the feel for “how tight is right,” and pretty quickly was a fast way to get relegated to sales-only or sweep & shovel duty. No budding wrench wanted that to happen.
Metal Parts Versus Carbon, Composite, Plastic
When most bicycles and parts were made of metal, that approach to learning how to tighten right worked. Because you could actually feel it. Today, with so many carbon, composite and plastic parts, if a rookie mechanic tried to use the old way they would end up breaking things all the time. Because you can’t feel it.
And, with carbon and composites, it’s not even a good idea to test parts for proper tightness because if there’s a bur on a seatpost collar or stem it could cut into the carbon creating a failure point if you try to see if it’s loose by twisting or pushing/pulling.
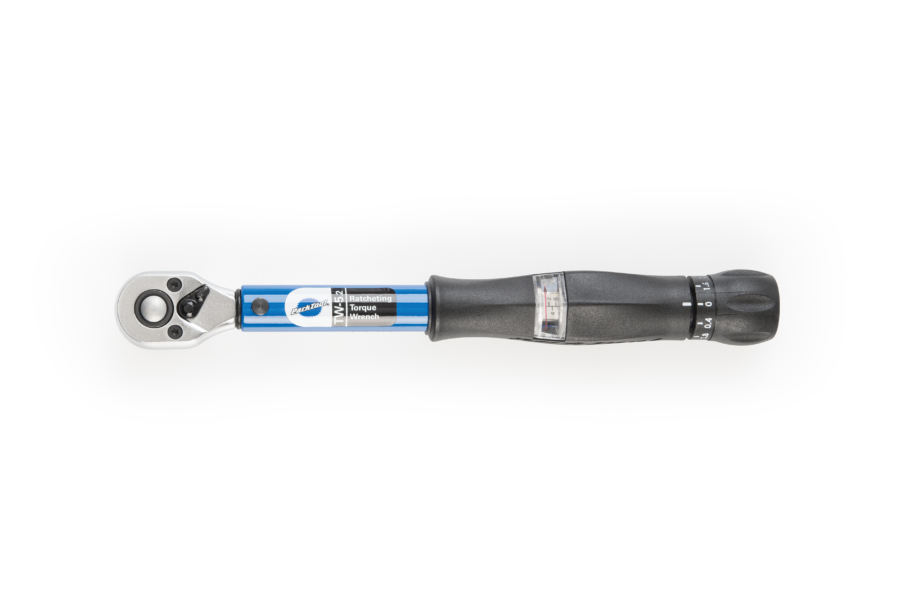
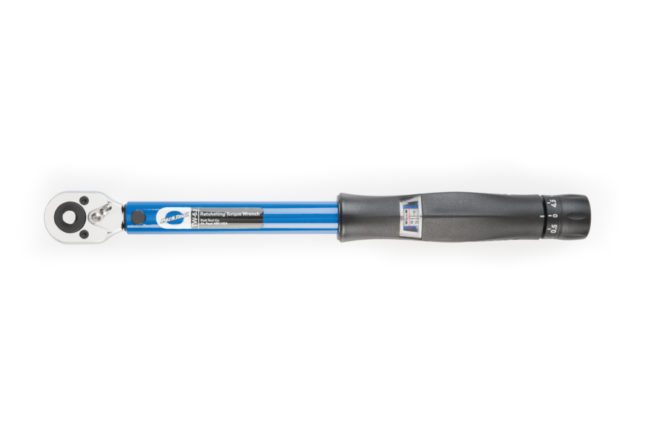
So, today, I recommend everyone buy and use a torque wrench or two or three. The torque wrenches on my toolboard today are Park’s TW-6.2 ($130.95 suggested retail price) which is for parts that are tightened a lot (it covers from 10-60 Newton meters), such as some crankarms. And the TW-5.2 ($113.95 SRP), which covers 2 to 14 Nm, which covers stem bolts and many other small fasteners. Both are ratchet 3/8 inch drives. If you want to check them out, here are the links:
https://amzn.to/34z3MeK
https://amzn.to/3gpTCzI
How To Be Sure To Tighten Right
For guidance on tightening things, I first look on the part I’m tightening. Lots of parts now have laser etched on them the recommended torque. Sometimes it’s hidden underneath the part so keep looking if it’s not right in plain sight. This is a wonderful development meaning you don’t have to spend hours searching for the right torque – or try to remember it.
If I can’t find it on the part anywhere I next look for help on the company that made the part’s website. Sometimes their product page will include torque specs or if not right there, sometimes they provide pdf instructions for the part that you can download and find how much to tighten to.
If I can’t find torque specs from the part maker, I will refer to Park Tool’s torque chart (the link above), which for fast access comes up for me if I ask Siri for bicycle torque specs on my iPhone. Or you could Google it. You might discover other bicycle torque spec charts out there from helpful online cycling sites, too.
If you wanted it would be a fun and relatively easy project to create your own torque chart for the parts on your bikes.
Even With Torque Wrenches You Have To Use Your Best Judgment
The one thing to know is that sometimes you will run into a part on which the manufacturer’s recommended torque is inadequate for the job. This happened to me not long ago with an E*thirteen dropper post (a mountain/gravel bike seatpost that lowers and raises by pressing a lever on the handlebars).
The post was cable-activated and at the recommended torque the pinch bolt (AKA “anchor bolt”) did not hold the cable. So every time I hit the lever instead of the dropper dropping, the cable slipped in the pinch bolt. Grrrrr.
While it was obvious I needed to tighten the bolt more, it was a tiny bolt and it felt like it might not be able to take it (that’s my old feel for when I’m about to break something kicking in).
I decided to call E*thirteen and they said, just tighten it until the cable doesn’t slip. That’s what I would have done before the days of torque wrenches in bike shops, but it’s one of the catch 22s of modern parts. You don’t feel safe exceeding torque specs, but sometimes you might have to. Double-checking torque spec first is always a good move.
Don’t Mix Up Torque Measurements
Also, don’t mix up the three common torque measurements, Newton meters, inch pounds and foot pounds. Make certain you are using the correct reading on the torque wrench. Sad story, a friend tightened his brake levers on his carbon handlebars to 50 Nm when it was supposed to be 50 inch pounds – a huge difference. The Campagnolo levers crushed and cut the $400 handlebars. The Zipp handlebars were not covered under warranty.
So, you do have to be careful, think about what you’re doing and gather whatever torque specs you can from the sources you have. That along with nice torque wrenches, like the ones I use, should go a long way to not breaking anything while tightening them right.
Tip: Back to reaching out the E*thirteen, the bike industry is great that way. You can usually get someone to pick up the phone and answer questions like this. Look for their contact us page on their website. Call the phone number and when someone comes on, tell them you’re looking for technical support. If no one picks up the phone, try again later. There might only be a few people on phone duty.
For more torque wrench choices and tightening tips, be sure to read my longer article on the subject: https://www.roadbikerider.com/top-cycling-torque-wrenches/.
10,270 Daily Rides in a Row
Jim Langley is RBR’s Technical Editor. A pro mechanic & cycling writer for more than 40 years, he’s the author of Your Home Bicycle Workshop in the RBR eBookstore. Tune in to Jim’s popular YouTube channel for wheel building & bike repair how-to’s. Jim’s also known for his cycling streak that ended in February 2022 with a total of 10,269 consecutive daily rides (28 years, 1 month and 11 days of never missing a ride). Click to read Jim’s full bio.
Jim: Great advice. One tip for those who are new to carbon parts…I have found that using carbon paste or fiber grip on carbon parts allows less torque to keep parts (especially seat posts) tight. This way, I do not have to worry about damaging parts or frames while still getting things tight.
As much as I like Park Tools, their torque wrenches are expensive for low scale stuff. You can go on Amazon and find Bulltools 1/4-inch drive with a range of 2.26 to 22.6 nm with an assortment of bits made for bicycles and motorcycles for just $49.99, no need to spend hundreds of dollars if you research it more.
You mention it in your longer article, but it is worth pointing it out again here – a good choice for home mechanics is the Part Tool ATD 1.2 (your other article talks about the ATD 1, but it looks like Park has now updated the tool). Link is: https://www.parktool.com/product/adjustable-torque-driver-atd-1-2
While not inexpensive, it is more reasonably priced than the full size torque wrenches Park (and others) make. The range is limited to 4-6 Nm, but that pretty much should cover any bolts on the bike you need to tighten, and it is small enough to take with you when travelling.
Jim,
Great reminders about torquing fasteners…but use the tools as designed to be used…no choking up or long reaching…as I think you’ve mentioned before.
You briefly mentioned burrs but didn’t elaborate…My take is to deburr all possible locations where a burr could damage anothe part with even a slight rotation. (Particularly carbon but alloy & steel also)
Hand file or abrasive cloth can be used on seat post collars, seat tubes, handlebar clamps, stems & slots etc,… Anywhere there’s a sharp corner. Always clean up after using an abrasive or file.
Jim, you helpfully suggest that “for guidance on tightening things, I first look on the part I’m tightening.” But you may also need to look at the other parts involved. I have an FSA OS115 stem that’s etched with “8.8Nm” on both ends (steerer and bar). It was original equipment on a 2005 Cannondale that had both a carbon steerer and a carbon bar, but 8.8NM is way too much for most carbon bars and will likely damage them – the bars are likely to have a limit of around 6Nm. Yes, I learned this the hard way – I carefully set my torque wrench to 8.8Nm as etched on the stem and the faceplate, and proceeded to put a stem-shaped dent in a new carbon bar.
Thanks very much for the additional tips, readers – very helpful!
Jim
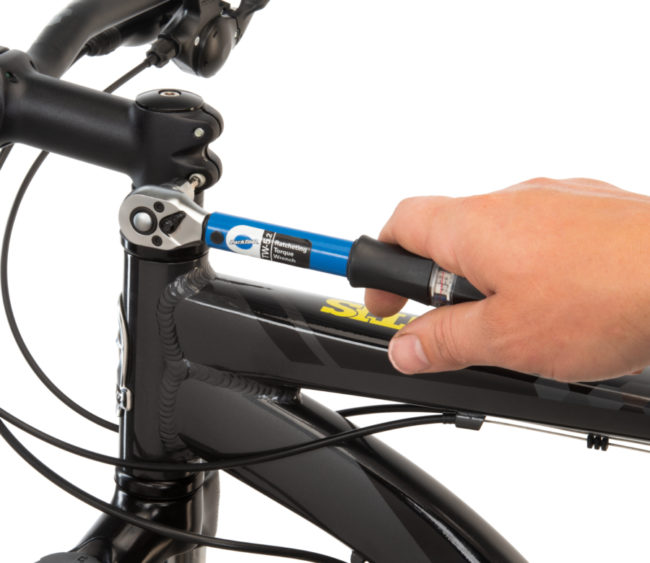
Just as important is to learn how to correctly use a torque wrench. Don’t choke up on the wrench thinking that’ll you’ll slightly under torque the fastener. In fact, you’ll over torque the fastener. Make sure you hold the wrench on the hand grip area.
+1 for the Bull Tools torque wrench set.
Absolutely right. Here is a good video from Calvin at Park Tools that show how you hold the wrench really matters: “Tech Tuesday #13: Torque Wrench Accuracy”
https://www.youtube.com/watch?v=BPe1-bDFVRM