
Jim’s Tech Talk
By Jim Langley
There were so many helpful comments for reader Rick Oberle, who last week asked for solutions for his major pedal problem, that I’ve used them to create today’s best clipless pedal tips article (thank you all!).
Many new riders are hitting the road right now and your experience, recommendations and advice is sure to help them enjoy going clipless trouble-free. Follow the link above to read all readers’ comments in full for complete details and the new comments below this article, too. There’s something for everyone.
Before we get to the tips, let’s catch up with Rick, who followed the comments as they arrived and sent me this update on his issue, which it sounds like he now understands thanks to an assist from his LBS.
Shimano Taking a Look
Rick wrote, “Jim, it turns out they are not 105 pedals but rather something cheaper but I forgot the model. They are the 105-style cleats nevertheless. I took the pedals to the local shop where I got them and the guy scratched his head as hard as anybody. He called Shimano and they are going to warranty them. As we drilled down into the circumstances, there is something wearing the front of the pedal away. It is not clear if the wear is coming from the cleat side or the shoe side of the pedal.
The right one is wearing in the same way but not nearly as much. At this point, there is no clicking in at all on the bad pedal. You can just put the cleat in and take it out with a small twist. They are going back to Shimano and I wonder if I might ever get a report on what they found as they explore what failed and why. The shop guy said he had never seen anything like it. We are also going to look at the float of the shoe or even go to a no-float cleat. More info Jim as I get it.”
I thanked Rick and asked him to let us know if he does hear back from Shimano with anything more.
Best Tips
New-users clipless safety tips
Reader Peter Foster mentioned his binding cleats causing crashing. So to start – and especially for rookies, let’s talk a bit about safe pedal use. Here are two key things to know with any new system that locks the feet into the pedals – and this includes toe clips and straps.
1) From your first ride and forever on, keep in mind that being locked in to the pedals is highly unlikely to cause you to crash unless you decide to stop and can’t get out. So, the rule to always follow is, if you think you might have trouble getting out of the pedals, DON’T STOP unless you’re next to something you can hold on to such as a parked car or pole, etc. I’m not talking about mountain biking when obstacles can cause crashes due to not getting your feet out fast enough.
2) Getting in and out of clipless pedals takes practice (toe clips and straps, too). And, the more practice, the better. Practice before your first ride! To do it, stand over your bike on a lawn/soft surface, and click one foot into and out of the pedal at least 50 times. Repeat with the other foot. Once you get the hang of it, do it without looking at your feet. Practicing like this trains the muscle memory so that your body learns what it takes to find the pedal and how to move to get in and out.
“MTB” clipless pedals & shoes are a great choice for roadies
Lots of RoadBikeRider roadies – all super experienced pavement pounders, highly recommend giving mountain-bike style clipless pedals and shoes a try. These systems are easier to enter because the pedals are dual-sided. Unlike one-sided road-specific pedals where you sometimes need to look down to make sure you’re clicking into the correct side, with MTB pedals, you can just put your foot on the pedal and the pedal will position itself for easy entry. And since these pedals and cleats are designed for the rough and tumble dirt world, they’re significantly longer lasting than most road systems – especially the cleats.
Plus, unless you’re a hard-core competitor who rarely stops on rides, you’ll love the walkability of these systems. The shoes have lugged soles for excellent grip on all surfaces and the cleats are recessed so as not to interfere. Having the cleats tucked up inside the soles saves wear and tear, too.
Adjust clipless pedal entry/exit tension
Related to safety and also proper function and ease-of-use, it’s important to understand the features of your pedal system and how to use them. Many have a screw for adjusting entry/release tension and it has to be set correctly for the rider. Beginners often need looser tension, while experienced riders may need it tighter.
As reader Jim Skinner opined, “It is important to be sure the pedal tension is adjusted accurately and for your preference for how hard you wish to have to twist to get your feet out. If your pedaling stroke is a bit wobbly, you may need to have a bit tighter adjustment.”
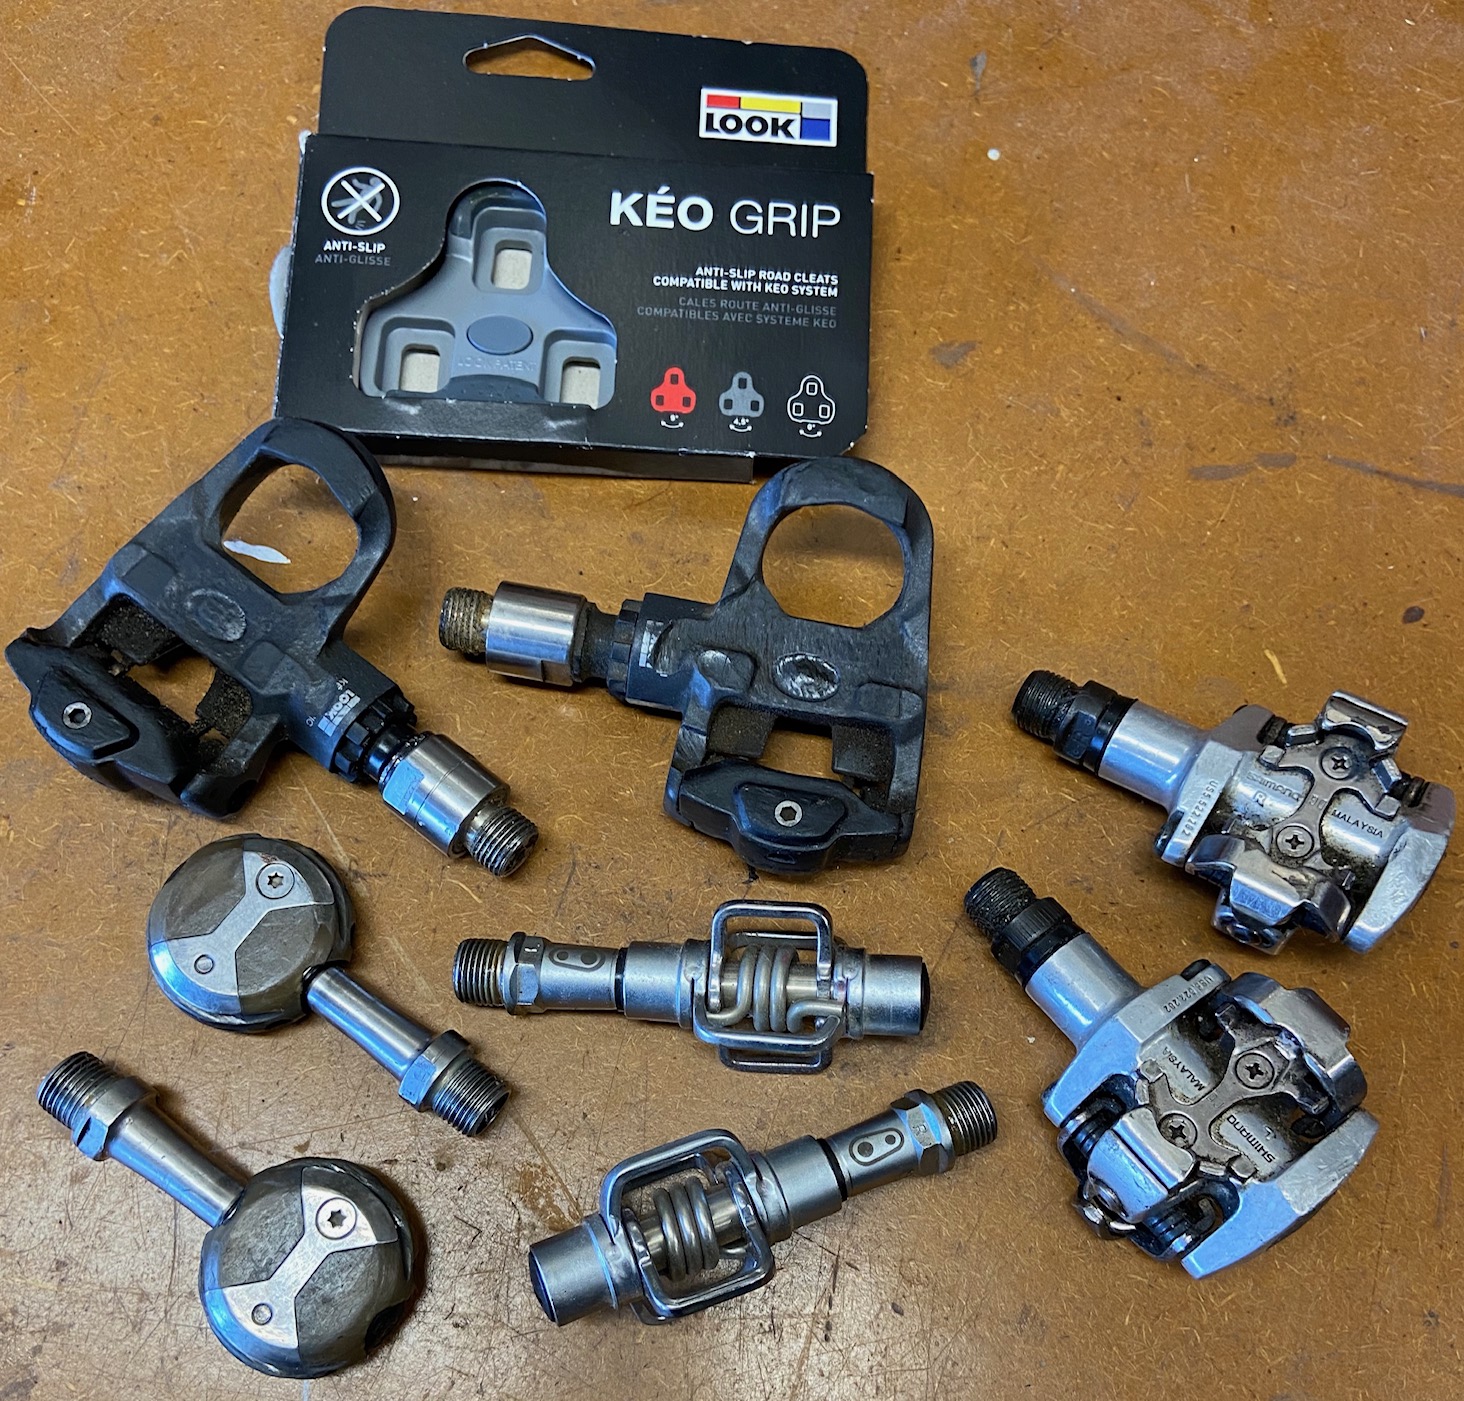
Check plastic cleats often and replace as needed
Plastic cleats wear from use so it’s a good idea to keep spares on hand. Also, be sure to mark your cleat position on your shoe soles. These steps serve two important purposes: 1) It allows changing out the cleats on short notice; and 2) Having spare cleats (and even pedals), lets you compare to spot wear early.
As Joe Mitchell recommends, “Lots of questions can be answered using a 5x or 10x hand-held magnifying glass and calipers from the hardware store, then comparing old pedals to new and old cleats to new.” Most cell phones these days have amazing magnifiers (it might be the zoom on the camera), too.
Jim Klein’s tip is that “When the shoes starts to creak when climbing a mountain or hill it indicates the cleat is worn and needs to be replaced. He also says to put a dab of grease on the retaining tab on the front of the cleat to get you home without the creaking.” If you don’t carry any grease with you on rides, you might get enough to quiet the pedals by taking it from the chain. I have also stopped creaking cleats by periodically spraying them with my bottle.
Keep plastic cleats clean
One of the important things you can do to keep plastic cleats like new as long as possible is to clean them. Anytime you’re walking, there’s a chance for the cleats to pick up dirt. It gets packed into the screw holes and around the cleats, too. If it’s muddy, you’ll have to scrape it out with a stick, etc.
On those days you should avoid walking off the pavement if you can help it. But, if that’s not possible, clean the cleats as best you can. If you can spare it, squirting them with your bottle can help loosen packed dirt making cleaning a little easier. Striking the shoe against the ground or some rigid object can help knock packed debris out too. If you’re on the bike trying to get going, you can carefully rap the shoe against the side of the pedal and often that’ll jar the packed dirt out – if you’re lucky anyway.
Use cleat covers to protect exposed road cleats
Ed Cisler recommended cleat covers. He said, “Using cleat covers when you’re off the bike helps cleats last longer. And everyone knows how funny and loud we are walking and sliding on tile floors in convenience stores in road shoes without them!”
Cleat covers are simple rubber boots that press on to protect the cleats and provide grip/traction when walking. You need to get the correct type for your pedal type and model. For easy access so that you are most likely to use them, you might keep them in a jersey pocket. For Speedplay X pedals, there is a nice cover option called Keep On Covers because you put them on the cleats and leave them on (you can still get in/out of the pedals as normal). Here’s a link: https://amzn.to/3m0gwyq.
Investigate entry/exit problems ASAP to prevent more serious issues
Because pedals are something we step on, they can be taken for granted and glitches can go unseen. I once stopped to try to help a rider walking his Colnago. He was 50 miles from home and had lost two of the three screws holding his cleat on. He was hoping to get lucky and find at least one of the screws if he backtracked enough.
He admitted that he had noticed some looseness when he left town, but hadn’t thought it was anything to worry about. Had he only checked the screws, he wouldn’t have broken down. Clipless pedals and cleats take a beating so be sure to check for issues and address them immediately.
Get fitted to perfect your cleat position
Several bike fitters pointed out that many problems with clipless pedals and even injuries result from improper cleat positioning. John Higgins http://bikefitr.com explained, “As a bike fitter I’ve never had a busier year! A lot of shops have stopped fitting, but the independent fitters have been hard at it, local restrictions permitting. Regarding Rick’s issue, it is likely the pressure on the right pedal is uneven i.e he is not flat footed across the pedal. He may be a candidate for a wedge under the cleat to spread the load and force out, but that is just one idea out of many issues.”
And coach Rick Schultz bikefitnesscoaching.com says that most of his clients he works with have cleat alignment issues. Meanwhile Richard Paul Handler offered extensive tips for ensuring it’s okay for you to use a walkable clipless system (please see his comment to learn more at the bottom of this page: https://www.roadbikerider.com/clipless-pedals-problem/).
Wonderful tips everyone – thanks for sharing and please comment with any additional clipless tips that come to mind.
Ride total: 9,800
I’ll add one more tip to this great list. After installing new cleats — even if you tried your best to line them up with the Sharpie outline on the sole of your shoes — go for a short test ride near home to ensure you can click in and out with no issues.
Don’t just hit the road on a long ride and only then realize your cleats need adjustment.
Thanks, John – very important tip – thank you!
Jim
I’ve used SpeedPlay Frogs, which are a MTB pedal, since 2013 on a road bike and I like them, mainly, like the article said, I can ride somewhere and walk around if I want to. Also, again as the article mentioned, I’m still on the original cleats. They are a full float pedal which took about 3 weeks to get used to. The only problem with the Frogs is that SpeedPlay stopped making them and the cleats for them! GRRR!!!
Fred I used Speedplay Frogs since they were introduced back in the nineties. When they started selling the SYZR I bought a pair and I love them. They took a couple of weeks to get used to and brake in but have had no issues and the cleats last much longer than the Frog cleats.
After many years of road cycling with competition type shoes and cleats I changed to SPD SIDI shoes during a 5 week cycling trip. Rode 1000 miles and to my amazement I found no difference in performance on the bike but off the bike was able to walk about with ease. Joe D / Chicago
“If you don’t carry any grease with you on rides, you might get enough to quiet the pedals by taking it from the chain.”
Many of us carry a tube of lip balm (e.g. Chap Stick). It works great on cleats. BTW – This is a handy source of (clean) emergency lube for almost anything – including a developing saddle sore.
Great tip, Rod. Thanks for sharing!
Jim
I have modified SPD cleats by grinding off the rear locking tabs. This will allow you to remove your foot by simply lifting while retaining most of the advantages: Positioning your feet properly and allowing you to push down and back. Could be a good way to learn or to use around town if you are nervous about clipping out
One just has to do the “Artie Johnson” at least once on a group ride.