
By Jim Langley
One of my favorite things on rides with friends is coming to their rescue, fixing breakdowns and keeping everyone rolling – not standing by the side of the road waiting. If you enjoy solving problems and being the hero for your riding pals, I bet you feel the same way.
All it takes to be a hero and repair most common breakdowns is a little bicycle mechanic know-how and carrying a bike mini-tool, plus a couple of small ride-savers that easily fit in a seat bag.
Large Tire Cuts & Broken Chains
In this Tech Talk, I describe what I carry, and how I handle two common issues I see over and over on group rides: large tire cuts and broken chains.
With wide gashes in tires, simply inserting the spare tube won’t work because when it’s inflated, it will bulge out of the hole in the tire, expand and explode. This goes for large cuts in tubeless tires, too. The sealant won’t work on a large hole, so the spare tube is needed – but only after the hole in the tire has been patched.
And, with a broken chain, unless it’s all downhill on the way home, your buddy’s probably not riding there unless the chain is fixed. There’s an easy way to fix broken chains, as long as you’re prepared (keep reading).
On-the-Road Tools
For fixing these and other common problems, such as seat-height adjustments, loose bolts, cable adjustments, etc., I carry a Crank Brothers M-series mini-tool. But the brand you get doesn’t matter as long as it has most of the tools you need for on-the-road repairs. Make sure it has a chain tool that actually works.
Since I often end up fixing flats, rather than a mini-pump or CO2 inflator, I carry a full-size pump because it’s so quick and easy to use. And I also carry quality tire levers since tire and rim standards have slipped so much and you can run into way-too-tight tires.
I’m also the wobbly wheel wizard and prefer truing hoops with full-sized separate spoke wrenches instead of the ones built into in most mini-tools. I carry Park Tool’s Red and Black spoke wrenches. They’re small and easily fit in any bag.
Tip: Ride heroes can’t carry every type of spoke wrench out there. If you ride wheels that came with their own spoke wrench, keep it in your seat bag so you can be rescued.
Fixing Cut Tires
Park Tool’s TB-2 Emergency Tire Boot is my take-along for handling cuts in tires. This 3 X 1.75 inch (76 x 45mm) adhesive patch is large enough to cover most holes and sticks fast to keep the tube 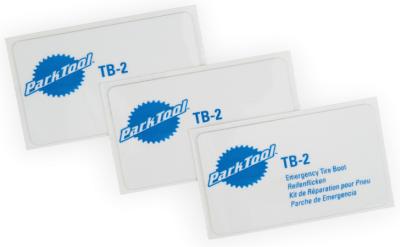 inside the tire. Note that with bad enough cuts, the tire will have a blip or wobble at the hole. You might decide to pump to slightly less pressure if it looks iffy. But in most cases it’ll get the rider home.
Tip: If you don’t want to purchase tire boots, make your own by cutting patches from denim or canvas. Saturate them in household rubber cement and let them dry. Then store them in a baggie. To patch a tire, apply tube patch glue to the inside of the tire, let it dry and then apply your homemade boot. With this kind of boot, it’s good to carry a small amount of talcum powder to dust the exposed side of the tire boot before installing the tube so the tube doesn’t stick to it.
Fixing Broken Chains
I may write a longer Tech Talk on the many ways to repair a broken chain on your own. But since this article is for fixing other riders’ chains, I’m going to cover the easiest way to get someone pedaling again.
That technique involves using your mini-tool’s chain tool to remove the ends of the chain that were damaged so that the chain  ends will accept and can be joined by what’s known as a “master” or “repair” link, such as KMC’s Missing Link.
Other companies offer repair links like this, and they all work like magic. Think of them as a tire patch for the chain. You want to carry the right sizes for the riders you ride with most of the time. You might carry 10- and 11-speed models if everyone’s on more modern bikes. Since these links are tiny, you can easily carry as many as you want.
Read the directions for the link you’re using it so you know how to install it. And if yours are expensive links, you may want to get paid for it or have riders promise to give it back when they get home and have their chain fixed. Be sure to also warn riders with just-fixed chains (often slightly shorter now) to avoid shifting onto the largest chainring and larger cog combinations since the chain may not make those shifts anymore.
Tip: If the chain isn’t damaged too badly, a repair link might fix it for good. But if multiple links had to be removed (maybe they were bent too badly), the chain will end up much too short and needs to be replaced or repaired later.
Feel free to add your favorite common breakdowns and on-the-road repair tools, tips and tricks in the Comments below the Newsletter version of this article.
Jim Langley is RBR’s Technical Editor. He has been a pro mechanic and cycling writer for more than 40 years. He’s the author of Your Home Bicycle Workshop in the RBR eBookstore. Check out his “cycling aficionado” website at http://www.jimlangley.net, his Q&A blog and updates at Twitter. Jim’s streak of consecutive cycling days has reached more than 8,000. Click to read Jim’s full bio.
i use SRAM chains because they have removeable “master” links {“power links”}.. I also keep them after the chain wears out for this situation, broken chains, by me [never happened] or others [could happen]. very handy in case, small, light, and free…
I also carry needlenose pliers and a small crescent wrench, though they are not classic bike tools. the times i have been a ‘road hero’, though, i have used both of them.
I have a needle nosed visegrip pliers. Small and light, and in addition to being adjustable to all bike sized nuts it allows applying force when they are frozen (as a tourer my rack nuts often loosen even with nylnuts).
Several times I’ve repaired punctures and cut tires with a folded dollar bill between the tube and tire. The bill is actually quite strong, doesn’t unbalance the wheel, and someone in the group usually has one.
I’ve ridden over 60,000 miles and never experienced — nor ever seen anyone experience — a broken chain; I suspect it’s a red herring. Most common are flats, brake releases left open, broken spokes, and chains wedged after a chain drop.
I totally agree. For a cheap tire boot, I take about 6″ of duct tape and wrap it around a 5mm allen wrench. Missing links are ride savers provided, as you state, you have the right multi-tool to R&R. I’ve seen far more front derailleurs ripped from their rivets due to mechanics not knowing how to correctly install the support bolt and plate on Di2 systems. I’ve also seen far more rear derailleurs ripped off their dropouts than broken chains.
I only see about half the mileage on SRAM chains than Shimano chains on 11-speed systems. About 3,000 miles on a SRAM and around 6,000 miles on an Ultegra 11-speed chain. This isnt a 1x occurance but Ive tested a half a dozen of each and getting fairly consistent numbers.
I’ll weigh in to say that I, personally, have had a broken chain – and have witnessed a riding buddy have one, too. So, granted, while they don’t happen that often, they do happen.
Likewise I have not seen broken chains on rides, though I did ONCE see one on a tandem – they had the tools and parts from past experience. This “not seeing broken chains” reflects 50 years of group and solo riding and over 350K road miles of my own. I’m sure MTB riders see many more chain incidents. For tire boots I carry several pieces of Tyvek (the “synthetic paper” of FedEx envelopes). And the best thing you can have to be that roadside hero is experience and skills 🙂
[quote=Bike Fitness Coaching]I only see about half the mileage on SRAM chains .[/quote]
This is good information. I’m having chain issues (not sitting exactly on the cog) with my E-Tap that used to be perfect. Will try a new chain! 3,000 miles seems about right for the old chain.
Ditto regarding the comment about the rarity of broken chains. In 30 years of cycling (over 65,000 mi since keeping track in 2002) I’ve only seen one chain break on a ride. My broken chain strategy is simple: use my thumb (i.e., hitch a ride home).
Better way to fix a large cut in a tire: dollar bill folded two times or an energy gel (after consuming the gel) package.
Helped a guy with a broken chain at a gravel road race this past summer – my master link saved his day! He was poorly prepared but won’t be next time and perhaps he can help someone else.
wrap duct tape around tire lever, use cpl layers to patch. Cut and carry small patch of tire casing from spent quality tire for severe cuts, use the tape to secure patch.
I had seen broken chains on rides twice – once on my wife’s bike (7-speed, BTW) and once on my own. So things occur, while not extremely often.
The racing bib numbers also make good tire boots instead of a dollar bill, and, they’re free! You don’t have to worry about getting them back.
I’ve encountered broken chains 4-5 times in maybe 25000 miles of riding and perhaps half of that in a group. The ones I specifically remember were all failed master links. If you are not carrying a master link you can also push a pin partway out of an outer link, then push it back in again to close the chain up.
For tire boots, I just cut an old tire into short segments, trim off the bead, and there you go. You just can’t run it that way forever as they are usually too thick.
And…FiberFix Emergency Spoke Replacement. Cheap enough, and works great!
A piece of Tyvek from a FedEx envelope is also a very cheap and strong tire boot.
What can I do to help the poor kid riding along on nearly flat tires with Schrader valves? My skinny tire gear is all Presta.
In 20 years I’ve experienced one broken chain, if you could call it that. I hit a very nasty pothole in the dark while coasting at high speed (steep short descent that I take frequently, but wrong lane position this time). The chain whipped and somehow managed to separate the KMC master link (on a Sachs chain). Thankfully, nothing jammed and I was able to coast to a stop. The chain was otherwise fine and still in use, albeit with a SRAM master link now.
I have repaired chains for others a couple of times. I use master links on all my chains and carry the used ones to hand out in cases like this.
I’ve gotten up to 10K on Campy Record chains,, but I’m not very hard on my pedals, and have seen broken chains on a number of rides over the past 60+ years. When I’ve ‘sweept’ for various charity rides I bring extra tools,: a multi-tool, a chain rivet tool and a small (lite-weight0 crescent wrench. The only thing I couldn’t fix was a crankset that fell off a ‘department store’ bike. I also carry a patch kit and tire irons, of course, which along with the multi tool, I carry whenever I ride.
We have seen many flat tires caused by a small pieces of wire shed from steel belted auto tires that become so embedded in the tire casing that they are often very difficult to remove. During our Smart Cycling classes we recommend that students add a pair of tweezers to their tire repair kit. Many of the other other suggestions above are also excellent with regard to simple and effective tire boots secured in place with duct tape. The tape can be wrapped around a 35mm film canister or Rx pill container. Boots can be kept inside the canister/container.
Aren’t 10/11 speed chains too narrow for those pocket tools? I have 9 speed Campy, Park mini tool works, would use it on 10 but how about 11? I’ve used chain tool on road several times.
Seen Park patches bulge out of cut with normal pressure, you can get by with less pressure but wrapping a dollar bill all the way around the tube works just as well (as Park, or a Benjamin 🙂
I help people on the road and trailside all the time. Most folks are happy for the help and willing to learn how to do simple fixes themselves. Occasionally I come across younger males who don’t quite know how to handle having a middle-aged female bike geek help them out!
Mark, you need to carry a Presta to Schrader or make one. Last I knew you could get one from CantitoeRoad’s online store.