
Getting Angled Drop Bar Levers Aligned The Same

Jim’s Tech Talk
By Jim Langley
My old teammate Matthew (he’s on a new team for 2026) brought his Santa Cruz Stigmata gravel frameset to the shop a couple of weeks ago. I assembled it for him with a new SRAM Rival AXS group, Easton carbon wheels and a Specialized handlebar and stem.
This weekend he brought it back, said he was having a blast on the new rig and wanted me to fine tune it a little. He requested I angle the levers inward, toward each other. Actually, he had already moved them slightly to give me an idea of what he wanted.
I checked the torque on the levers and discovered they were still slightly loose after Matthew had moved them. I also noticed that the bar tape was a little off on one side. That’s a sign that the lever on that side might have moved. The pressure from hanging on can push them down if they’re loose.
To get the levers back in place, I unwrapped the tape to just below the levers. When I install levers, I draw a line with a gold colored Sharpie marking the top and bottom of the lever band behind the bars. Because of those easy to see gold marks on his black bars, I could tell that the right lever had slipped down about ¾ of an inch. That’s a lot.
Getting the Levers the Same
At this point, the challenge is to get both levers in the same place on the handlebars and also angled inward exactly the same. It was easy to simply return the levers to line up with my gold marks on his bars to get them at the same height. If I had not marked the bars or if I was setting up new levers, SRAM provides marks on the sides of the levers for aligning them. You use a level to get them in the correct spot and aligned the same.
Another way to do it, is to rest a straight edge across the hoods so that it’s positioned exactly the same on both levers. When the levers are lined up the same, the straight edge will be parallel with the handlebar.
That’s all fine and good, but Matthew wanted them angled inward the same too. It is one of the new trends for pro racers and Matthew is a serious contender who wants every advantage he can get with his setup. The benefit of angled levers is that they make you more aero.
A Simple Tool for the Job
I gave the task a little thought and realized that a simple angle gauge – I think of it as a carpenter’s tool – might do the trick. In the short video I’m using my Stanley angle gauge to get the levers angled the same.
Abbey Bike Tools makes a tool for it!
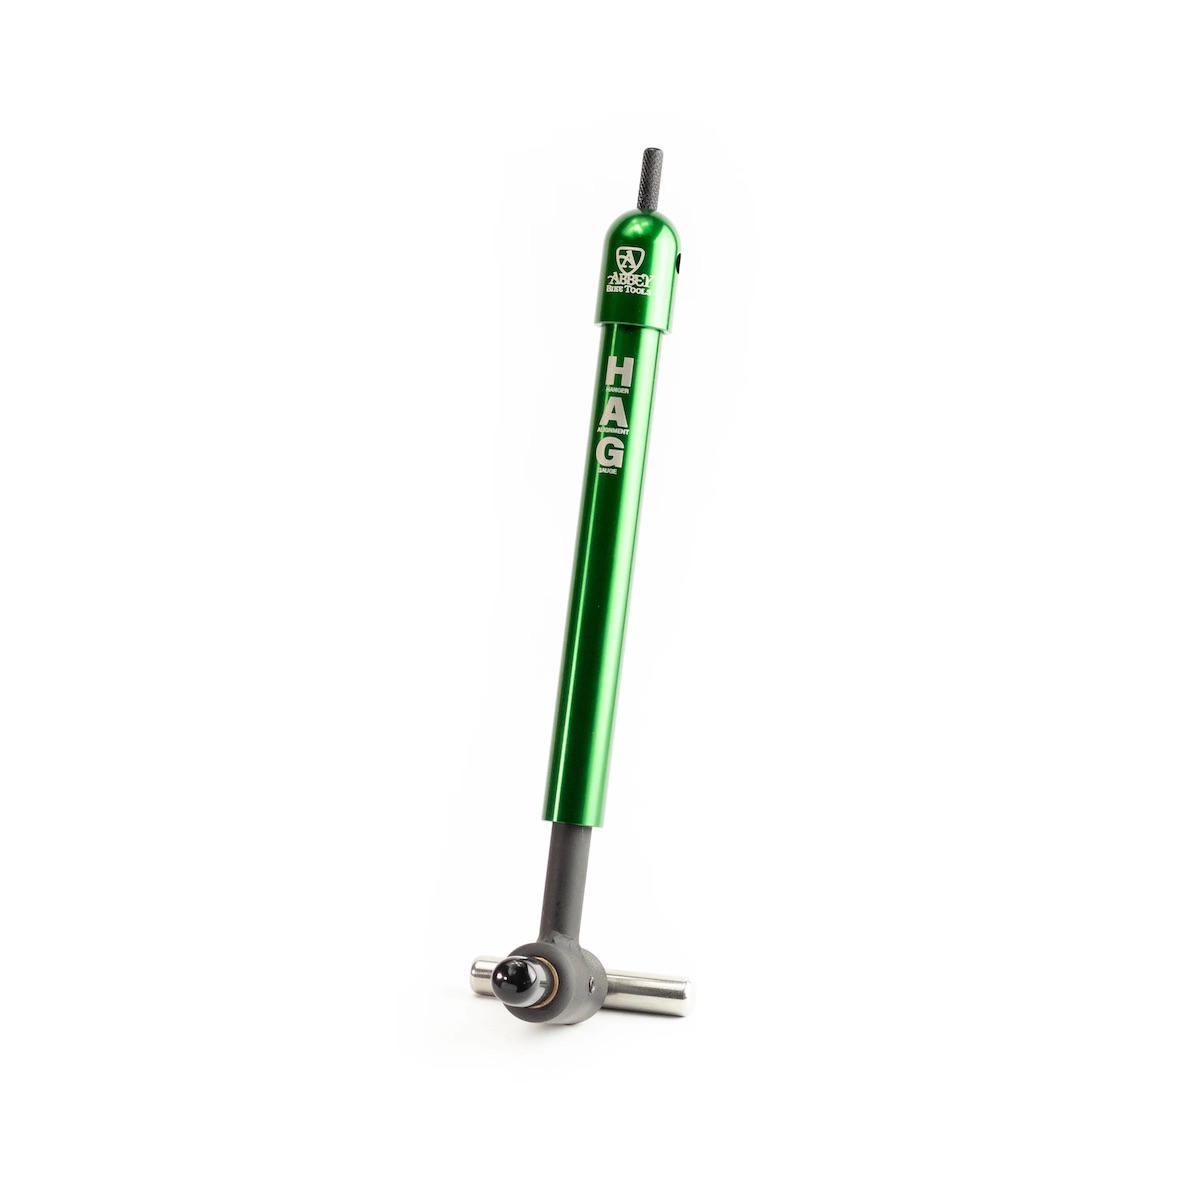
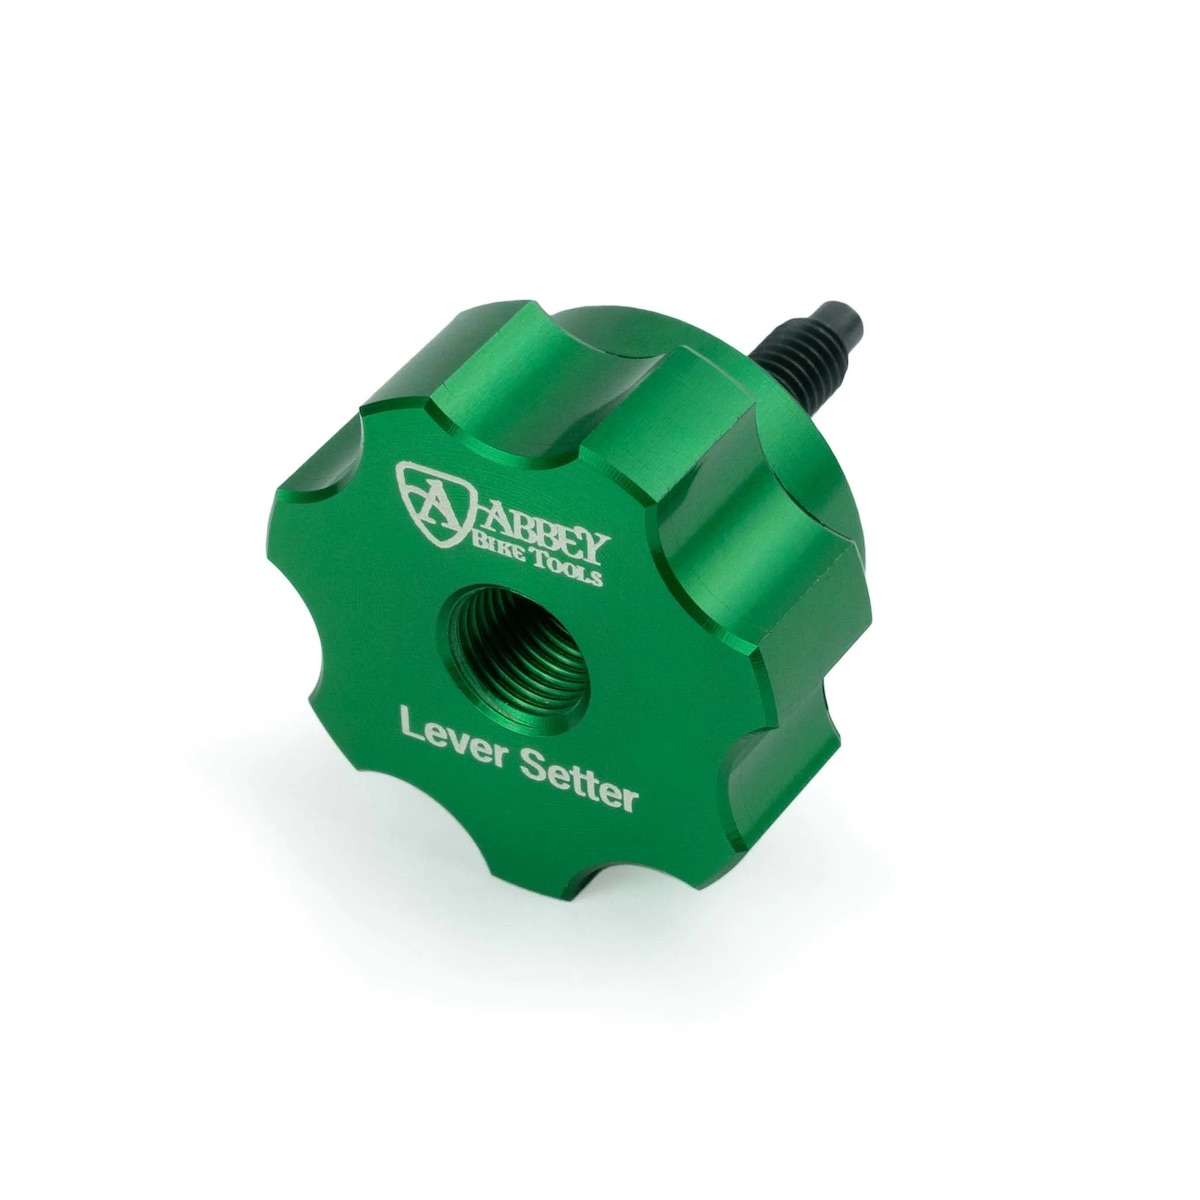
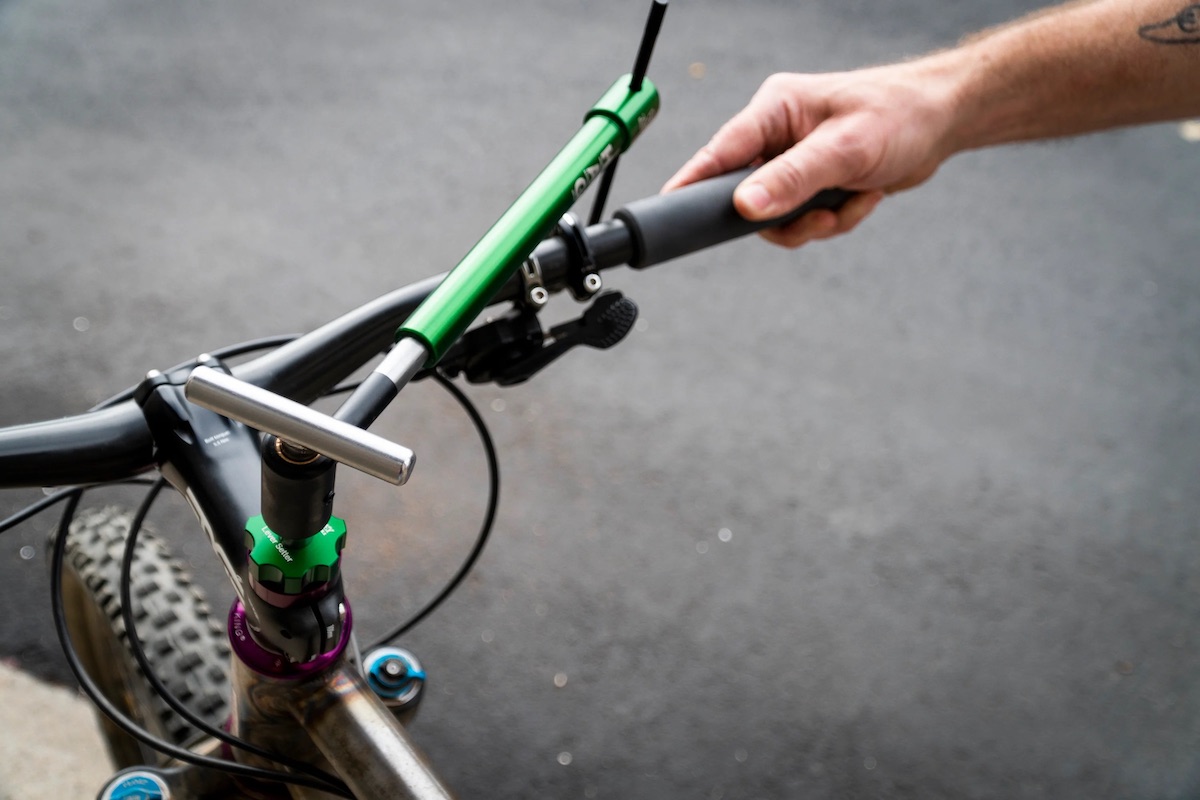
When my video went live, two people commented and reminded me that Abbey Bike Tools makes tools for this job. The main tool is their HAG for Hanger Alignment Gauge ($205) And the other tool is their Lever Setter ($37).
The Lever Setter threads into the fork steerer and the HAG threads into the Lever Setter providing a precision gauge to compare and perfect lever alignment. You can see how it works in the photo.
Abbey makes exquisite, easy to use tools. And the HAG tool is an essential for checking the alignment of derailleur hangers.
An Idea for Making Your Own
If all you need to do is check lever alignment, I think you could make a very dumbed-down gauge that works a little like Abbey’s. It could probably be built with the headset top cap and a piece of bendable yet stiff wire (like a welding rod).
Once the bolt that holds the top cap tight is loosened, the top cap can turn in place. With the wire pointer held in the center of the top cap, you would have a pointer you could swing to either lever. By bending the tip of the wire close to the lever, you would have a pretty accurate way to get the levers at the same height and angle I think. If you make your own tool like this please leave a comment telling how it came out.
Jim Langley is RBR’s Technical Editor. A pro mechanic & cycling writer for more than 40 years, he’s the author of Your Home Bicycle Workshop in the RBR eBookstore. Tune in to Jim’s popular YouTube channel for wheel building & bike repair how-to’s. Jim’s also known for his cycling streak that ended in February 2022 with a total of 10,269 consecutive daily rides (28 years, 1 month and 11 days of never missing a ride). Click to read Jim’s full bio.


Thanks so much for the detailed video on angled brake/shifter lever setup using the Stanley tool. Very helpful information indeed!
I’m a cyclist and wood worker from way back and officially this tool is called a Sliding T Bevel and is commonly used in carpentry and furniture building projects.
Thanks again!
I’m glad you liked the tip Jim! And thanks a lot for telling me the proper name for the tool. I appreciate it!
Jim
This is the third hanger alignment gauge recommended by Jim Langley in the last 3-4 years. When the Park gauge was recommended (2nd of 3) I bought one ($90?) and donated it to our nonprofit: http://www.bikex.org.
Do we need yet another???
hi Jim, yeah I’m piling on 🫠 its also called a bevel gauge, you can buy them with h a plastic stock and wingnut on the pivot too..
As a commissare i check lots of bikes to the UCI Annexure.
so over the years as an engineering guy. as the rules constantly change 🤪 I’ve made little templates & tools to check an entire entry list for Opens and Championships in a consistent and efficient timely effort.
Latest one, I actually purchased, its a “quilting gauge”, looks like kind of a large protractor, super easy to position and look through, to judge the inboard angle. ( you’ll see one on a google search “VViViD Patchwork & Quilting 90 Degree Protractor Ruler Template”).
I can zoom through several hundred bikes and get them to their start time.
My other simplest and prob most versatile tool for Comm and Jnr coaching is string.
Recall string theory ? Yes, humble taut string measures fixed lengths when taut…. works well from setting out pyramids to modern houses.
A small plumbob ( with a length of PVC tube over the brass hex to cushion the expensive gel coat ) on a length of 3mm Venetian blind cord, ( it doesn’t stretch ) with a loop in the strings end.
Pen or allen hex key goes in the loop into the top cap, straight line to, in this case to a same fiducial mark on each lever and easy check on symmetry..
The string and bob gets used to check saddle alignment has red / green go nogo coloured knots in it for min and max saddle length, the 50mm backset from bottom bracket, min max lever and bar width and TT bar lengths
I also use a “line level” on the taut string to check level across the levers, plumbob tells me the bike is vertical.
the go nogo lengths are in successive sections with the UCI Clause number on a tag adjacent.
And the inevitable “but…” comment – yes we check our floor surface is level to begin with with a 3 Metre spirit level.
Also pocketable , saves room for the dollars i didn’t spent 😁😆on the laser engraved Kool tools.
Keep up your long and storied career Jim, you’ve taught me quite a few tricks and tips since Ed was the Ed 😆
cheers from down under ,🚴♀️,🦘🚴♂️🚴