
Jim’s Tech Talk
By Jim Langley
Last week I attended an all-day seminar on setting up hydraulic disc brakes held at the United Bicycle Institute in Ashland, Oregon.
Ever since hydraulic brakes appeared on bicycles (in about 1987) I’ve wanted to learn more about them. Because they just sort of started appearing on bikes, at first on BMX bikes, then mountain bikes and now they’re available on most types of bikes.
Hydraulics – HUH?
My bicycle mechanics training going back to 1970 never included anything pertaining to hydraulic discs. So everything I’ve learned is pretty much self-taught except for the few clinics I’ve been able to attend put on by brake makers and the many tutorials on YouTube such as those by Park Tool.
The challenge with hydraulic discs is that they’re not an intuitive mechanism. Unlike cable operated systems, without knowledge of how hydraulic discs work, you can’t look at them and think about what’s wrong and always figure out how to fix them.
Also, there are loads of companies making them now and the designs are constantly changing. So you can run into all kinds of different issues that can be tricky to figure out if all you’ve worked on are for example, the most common models from Shimano and SRAM.
Back to School!
So I decided I should go back to school and learn from hydraulic disc brake experts and started looking for a school to attend. I was delighted when I learned that United Bicycle Institute bikeschool.com offers their UBI Disc Brake Seminar.
In their online course catalog it’s listed with their continuing education seminars along with FOX Master Tech clinic (suspension), Shimano Di2 course (electric shifting), and Dropper Post seminar. The cost for the day long disc brake seminar is $250 and it includes a certificate of completion.
College for Bike Mechanics
UBI has been teaching bike mechanics since 1981. Anyone can attend, you don’t have to be employed in a bike shop or working in the bicycle industry. And there are courses for all facets of bike mechanics and shop operation. They recently discontinued their frame building course.
Ashland, Oregon is not that far a drive from my home in Santa Cruz, California. Plus there’s affordable and really beautiful camping close by. So I pitched the idea of heading up there and taking the class to my buddy Tony who’s a tech at REI and who also owns an Escape camper he pulls with a tricked-out Sprinter van.
He too was eager to fill in the gaps in his hydraulic disc brake fixing repertoire so we went back to school together.
Highly Experienced Instructors
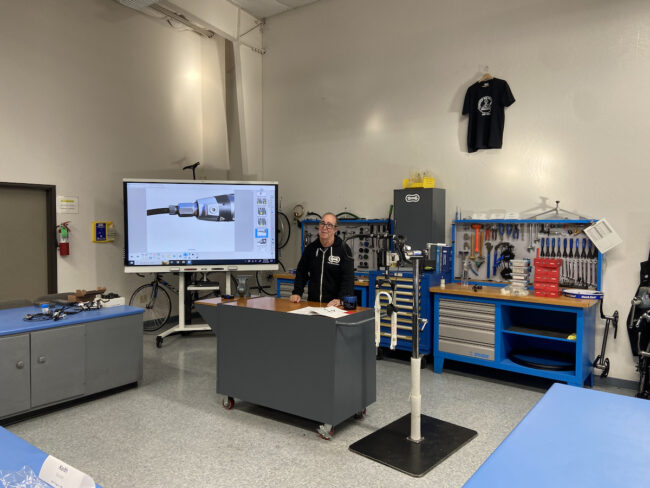
The class was led by Michael Mantione who worked for Magura and as a shop and event/race mechanic. Assisting Mike were technicians Peter Barson and Zachary Wood.
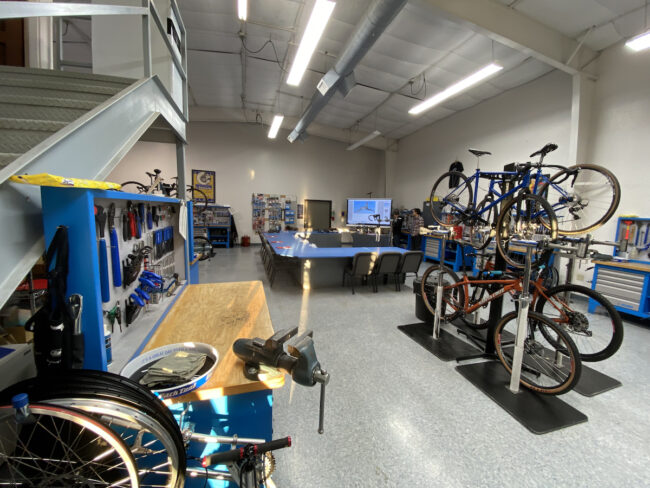
Top Notch Learning Environment
We students each had our own workbench and bikes to learn on. For each procedure Mike would show us what we were working on using a giant Smart TV you can see in the photo. For this we were sitting at a long desk so we could take notes. Included with the class was a 45 page manual including everything taught during the seminar.
I guess many schools have these amazing TVs now. It was the first time I’ve seen one. Mike could move all the graphics around, zoom in, change perspective which was super helpful since you could see the small parts much better to understand how things fit together and function.
After giving us an overview of each procedure (such as rebuilding a caliper), Mike would then have us come stand around his workbench to observe as he did the job. He would then ask us if we had any questions after which we’d go to our workbenches and try to rebuild our caliper. Mike, Peter and Zach came around giving us tips if we got stuck.
Completely Pro Setup
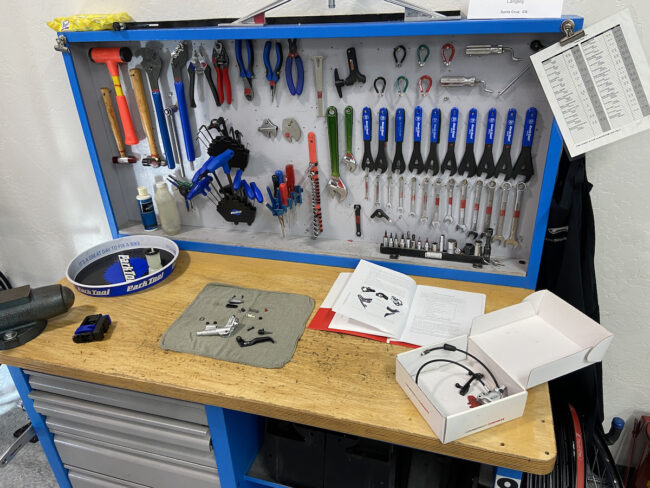
I was impressed with the workbenches. They were all exactly the same and all the tools we needed for the procedures being taught were right in front of us neatly hung on the toolboard above the bench or in drawers below.
It was a fun day as we learned MTB brake lever rebuilding, caliper rebuilding, cutting hoses and fitting them and brake bleeding both mineral oil and DOT systems.
We’ve talked about it around the campfire in the days since the seminar and Tony and I feel that we got a ton out of the day at UBI and that the teachers, facility and instructors were first-rate in every way. If you’re interested in learning bike mechanics or advancing your skills, I’m confident you will have a great experience at the Bicycle Institute.
Come back next week when I’ll share a few of the tips we learned at UBI. If you work on your own hydraulic discs they might come in handy.
Jim Langley is RBR’s Technical Editor. A pro mechanic & cycling writer for more than 40 years, he’s the author of Your Home Bicycle Workshop in the RBR eBookstore. Tune in to Jim’s popular YouTube channel for wheel building & bike repair how-to’s. Jim’s also known for his cycling streak that ended in February 2022 with a total of 10,269 consecutive daily rides (28 years, 1 month and 11 days of never missing a ride). Click to read Jim’s full bio.
Went to their bike mechanics course with an added couple of days for wheel building after I retired. Thought I might try working in a bike shop. Learned that wasn’t for me in addition to having a great experience there. Top notch learning opportunity.
Hi Jim, I think it’s actually Mike Mantione, not Manitone. After Magura, Mike was an instructor for years at Barnett Bicycle Institute and was one of the teachers in all of the courses I attended there. Of course BBI ended up being acquired by QBP, and I was wondering what happened to Mike after QBP recently shutdown the old BBI!
Thanks for the correction Pete, appreciate it! And it’s good to know more of his background.
Jim
Jim, Thanks for sharing your experience. It sounds interesting, educational, and fun. One more retirement educational opportunity for me, as well as a nice road trip. I’ll bet the skills in this class will transfer to my motorcycle restorations as well. However, one class might lead to another, adding to the cost!
Glad you enjoyed the story Harold. We were definitely talking about the other courses on our way back down the coast 😉
Jim
Jim. Would be interested to know if they discussed how to break in new disc pads and also what procedure you use.
Jack
Hi Jack,
Yes, they did discuss it. It’s called “bedding in” or “burning in” the brakes or pads. The process transfers material from the pads to the rotor increasing the surface contact area and it also helps align the pads to the rotor. Different brake makers specify differing bedding in steps. But the basic general procedure is to ride the bike at a moderate speed and then put on the brake until the bike slows but doesn’t stop, then repeat about 20 times. You don’t want the rotors to get hot so you don’t get going too fast or brake too long. As you do it you should feel the brake gripping better and better.
Hope this helps!
Jim
Hi Jim!
Very nice article. I spent just over a Month at UBI when I retired from the Army. The GI bill covered the cost of the classes so I took advantage. What a great program. I stopped counting how many times i’ve gotten into a bike and referred back to my manuals from UBI.