
The Do’s and Don’ts of Tire Levers

Jim’s Tech Talk
By Jim Langley
The thing that inspired today’s article was a recent social cycling post in which a well-known former USA cycling champion from the ’70s railed about a popular bicycle tool company’s tire levers because he keeps breaking them. Both the racer and the company will go unnamed here, so as not to offend or embarrass him, and because the failures were not the fault of the company, which I’ll explain here.
Important Tools to Bring Along
You probably know that tire levers are one of the things most people should carry along on rides because these simple pry bars (they usually come in a set of 2 or 3) make it easier to get bike tires off the rim so that you can repair a flat tire, which is the most common cycling breakdown.
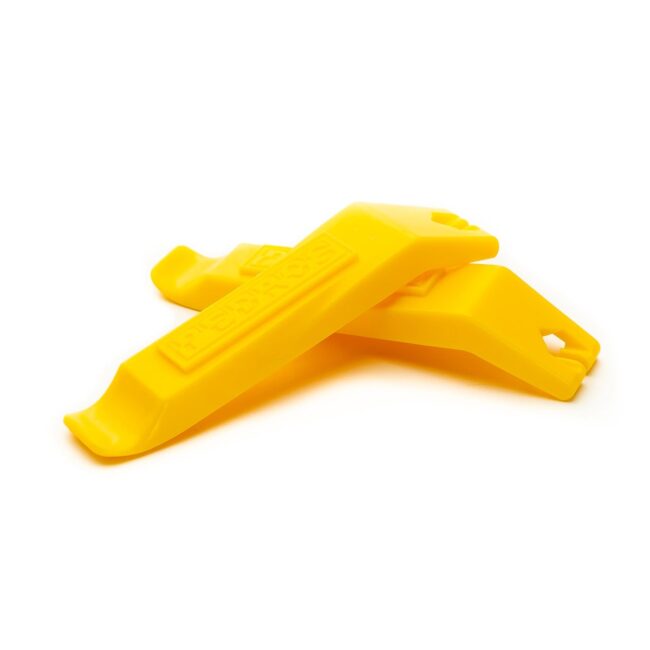
I say most people should have them on rides, because not everyone needs tire levers. Bicycle mechanics can usually remove and install tires by hand and even non-mechanics can be taught to do it. But even they might want to carry them, since things can happen that make it difficult to use your hands. For example, I couldn’t fix a flat with my hands only on a frigid ride in Vermont because of frostbite. Even with the levers I barely got the tire off.
Making Sure Tires Go On and Come Off Easily
The other reason to have them is if you have tight fitting tires. There’s a huge difference from tire to tire in ease of installation and removal. I recommend when choosing tires to check the fit before committing. That way, if the tire you’re considering is so tight you can’t get it on and off, you can choose a pair that fits better.
But the thing is that you might not know that you have difficult to remove tires and in that case it’s always best to have levers on hand because it’s unlikely the tires will come off without them. And that means you could be stranded just because you flatted. Or hopefully another rider will come along and help you.
Types of Standard Tire Levers
Back to our champ who is breaking tire levers, he didn’t actually explain “how” he was breaking them. But he did say that the ones he was breaking were made of plastic with a steel core, which means he’s not using the more common plastic tire levers (photo).
And that tells me that he’s using an awful lot of force on his levers since they’re reinforced with steel. A plastic lever would probably snap a lot sooner.
The Thing to Know about Tire Levers
The reason the levers are breaking is because he’s using them wrong. The best practice with tire levers is to use them for removing tires and never to use them for installing tires. I’ll show you 2 tire jack tools, which are designed for installing tires in a bit, but standard tire levers are not made for installing tires, but only for removing them.
My best guess is that he’s breaking them for 2 reasons: 1) he may not realize that you never try to remove a tire with any tool until you’ve let all the air out of the tire and tube (if there is one), and also have pushed the tire off the sides of the rim to create slack in the tire; and 2) he may not realize that tire levers are not meant for installing tires, and he’s breaking levers trying to pry tight tires up onto the rim.
Both are the fault of misusing the tools, not the fault of the tools themselves.
The basic problem is that our friend apparently doesn’t understand that tires go on and off best when they’re positioned correctly for installation and removal. The goal is to get as much of the tire as possible into the center of the rim, which is the deepest smallest diameter.
If it’s not there, the tire will resist going on because it’s not where it needs to be, to be able to lift it up and over the rim. I put a short video at the end to show how tires should be positioned to ease installation and removal with and without using tire levers.
The Famous Kool Stop Tire Bead Jack Tool
Kool Stop’s Tire Bead Jack ($15.99 https://link.amazon/B044tznof ) is famous because it’s been around for decades and it’s still a handy tool for when you absolutely cannot get a tight tire onto a rim. It’s not for tire removal, just for installation.
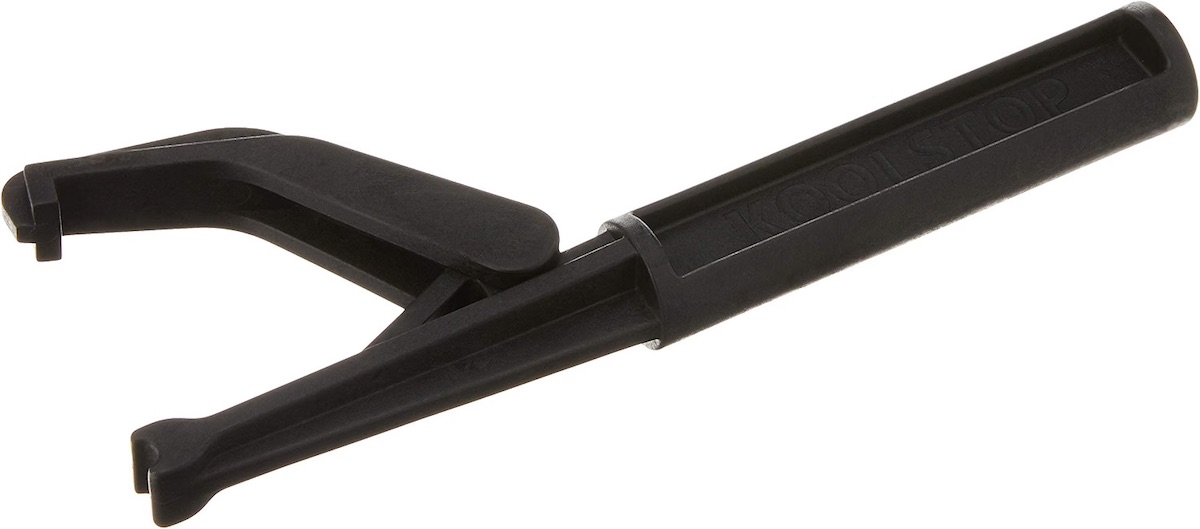
This is a large tool at 8.9 inches in length. I’ve seen people cut them down to carry them along but you’ll lose some leverage. The way it works is the notch fits onto the rim wall and the hook goes beneath the bead allowing you to lift and lever it up and in place on the rim.
There’s another tool which is a lot smaller to fit in a seat bag etc. and works the same way. It’s called the EZ Clincher Tire Tool ($12.95 https://ezclincher.com/) You can get an idea of its size in the photo.
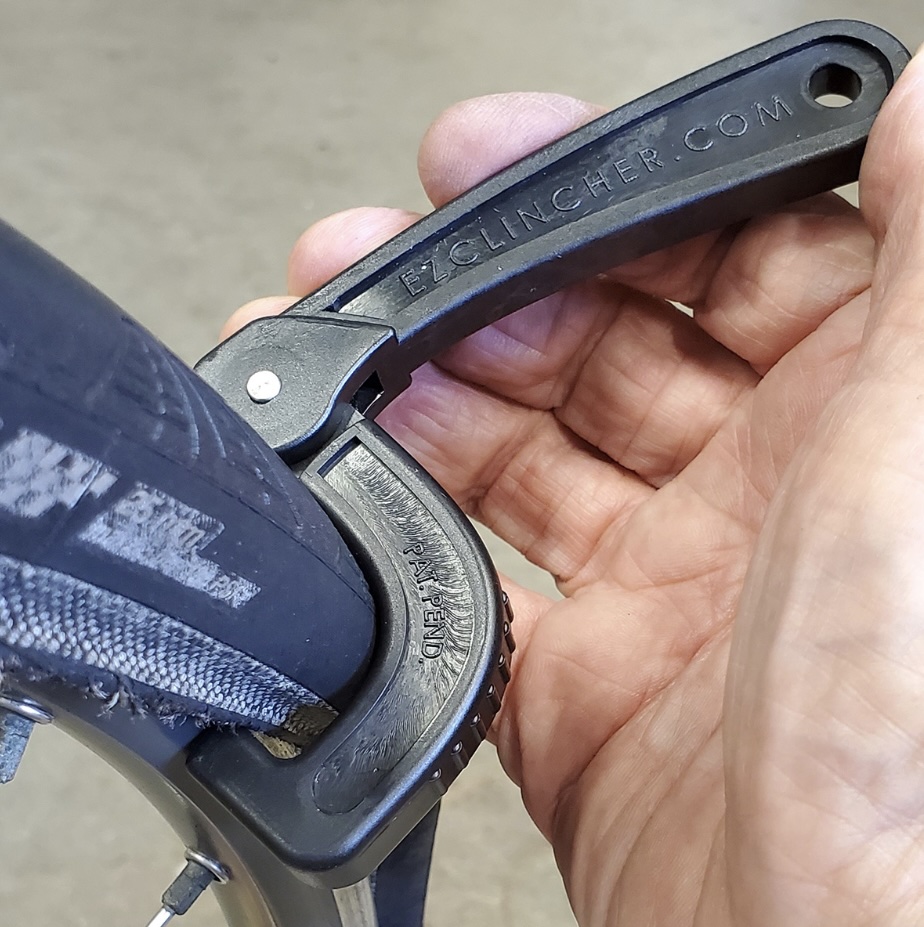
Finally, here’s the video showing how to get a tire into the middle to create the slack needed to remove and install it. With good fitting tires all you need is your hands.
Jim Langley is RBR’s Technical Editor. A pro mechanic & cycling writer for more than 40 years, he’s the author of Your Home Bicycle Workshop in the RBR eBookstore. Tune in to Jim’s popular YouTube channel for wheel building & bike repair how-to’s. Jim’s also known for his cycling streak that ended in February 2022 with a total of 10,269 consecutive daily rides (28 years, 1 month and 11 days of never missing a ride). Click to read Jim’s full bio.

